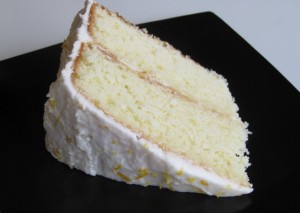
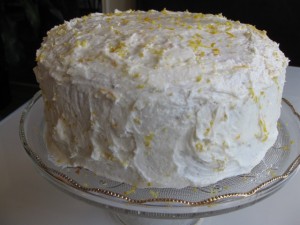
Lemon Cake
Time: approximately 2 hours start to finish. 30 minutes to prepare batter and distribute into cake pans; 30-40 minutes to bake and make icing; 20 – 30 minutes to cool; 10 – 20 minutes to frost.
Serves: 14-20 (or batter can be distributed into 24 cupcakes)
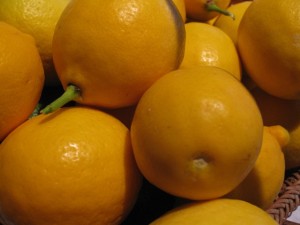
Inspired by: My friends really seemed to enjoy the Meyer lemon cupcakes I made this past Monday and I still have quite a few lemons from Arnie and Alice so thought I’d try a cake. I’ve only made a cake once in my life! Last night I hosted a wine tasting event and I told the group I’d make dessert so this was it. I think the icing was the best part of the cupcakes so that part I kept the same. For the cake, I could have used the exact same recipe and baked it a bit longer, but I thought it would be interesting to try another similar, yet different, recipe to see if I learn something about the different ingredients used and the end product. This cake turned out just a bit heavier than the cupcakes – just as good – just different. This is the basic cake recipe from the Alice Waters cookbook “The Art of Simple Food”. I just added lemon juice and lemon zest into the cake mix. This cake rocked. I won’t change a thing next time – well, maybe I’ll do three layers instead of two so there is an extra layer of icing!
Ingredients for the batter:
- 1 cup unsalted butter – softened (2 sticks)
- 2 cups granulated sugar
- 4 eggs (yolks separated from the whites)
- 3-5 teaspoons grated lemon peel
- 3 cups cake flour
- 4 teaspoons baking powder
- 1/2 teaspoon salt
- 1 cup milk
- 2 teaspoons lemon juice
- 1 teaspoon vanilla extract
Ingredients for the frosting:
- 1 half cup unsalted butter – softened (1 stick)
- 4 cups confectioners sugar (1 16 oz box)
- 4-5 tablespoons juice of the Meyer lemons
- 1 teaspoon vanilla extract
- 2 teaspoons grated lemon peel
Preparation:
- Get milk, butter and eggs ready to use and let them sit out and get to room temperature (approximately 30 minutes). I didn’t know this, but apparently using ingredients that are too cold can cause the batter to shrink and deflate will make the cake turn out denser instead of light and fluffy.
- You can pre-heat the oven now too and ensure it is staying at a constant 350 degrees. It needs to start out that hot or the cake will not rise and stabilize properly.
- Grate the outside of the skins of the Meyer lemons until you have enough zest (approximately 6 teaspoons – only grate the yellow skin, not the white part under that as it can be bitter).
- Juice the lemons in a small bowl until you have enough juice (6-7 tablespoons).
- In a large mixing bowl; mix the butter and sugar until very creamy (5-10 minutes is ideal).
- Beat in the egg yolks – one at a time.
- Add the lemon peel, lemon juice and vanilla extract. (When the lemons peel has a nice flavor use more, if it’s too bitter use less).
- In a separate bowl – combine the dry ingredients: flour, baking powder and salt.
- Add 1/3 of the flour mixture to the sugar and eggs, and mix lightly. Alternate adding the milk and flour mixture, ending with the last 1/3 of the flour mixture – mix only enough to incorporate all together – don’t over mix or that will toughen the cake.
- In a separate bowl, white the egg whites into stiff but moist peaks. Then stir one third of the whites into the batter to loosen it, and gently fold in the rest.
- Butter the bottom and sides of two or three 8 or 9″ flat cake pans, then add a layer of parchment or wax paper on the bottom of each, butter that, and then coat well with flour – tapping out any excess flour. This will keep the cakes from sticking to the pan after it is cooled.
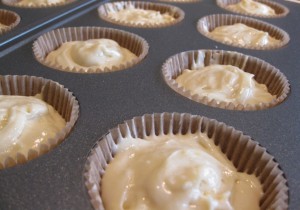
- Pour the batter into the pans – distribute equally between each. They should not be more than 2/3 full so there is room for the cake to rise.
- Bake at 350 degrees for 30 -40 minutes in the center of the oven – or until a toothpick inserted in the center comes out clean. Cool for 20 minutes.
- You can make the frosting while the cake is cooling —
- Combine the butter and confectioners sugar in a medium sized mixing bowl.
- Add the vanilla, half of the lemon juice (reserve half), and beat until smooth and creamy. Keep adding additional lemon juice until you get your desired frosting consistency and flavor. (I like a lot of lemon juice for a very lemony frosting, but if add too much the frosting will be runny. If it does get runny, add additional confectioners sugar to thicken.)
- Once the cakes are cool, just turn them upside down and the cakes should slide right out. If they get a bit stuck, insert a knife around the edges to loosen the cake and then turn upside down to remove the cake.
- If you’d like to use a knife to cut off the excess cake to flatten it you can. I just did this for the bottom later. A sharp serrated knife works best.
- Put one cake layer on your cake plate and frost the top of it. Add the next layer and frost the top of it. If you have a third layer, add that one and frost the top and then frost all of the sides of the cake.
- Sprinkle the cake with the grated lemon peel.
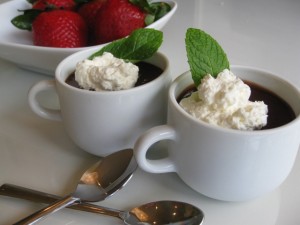
Easy Chocolate Mousse
Time: only 10 minutes to prepare plus 5 minutes to make the whipped cream; chill for 50 minutes or longer.
Serves: 10 very small espresso cups or 6 larger servings per above picture.
Inspired By: This is a Rachel Ray recipe. I was watching a show once that had her on at the end and she whipped these up in less than 5 minutes. I love easy so I had to try it. She calls these “Chocolate Cups with Whipped Cream”. I think they are very chocolate mouse-like although perhaps a bit denser/richer. One of these days I’m going to try this with white chocolate or even butterscotch chips – I’d probably use a bit of amaretto when I do that.
Ingredients:
- 1 cup semi sweet chips
- 1 egg
- 2 tablespoons sugar
- Pinch of salt
- 2 tablespoons booze; amaretto, Kahlua, dark rum, hazelnut liqueur or whatever sounds good – I prefer Kahlua
- 2/3 cup boiling milk
- Whipping cream (plus a little sugar and vanilla to add in when whipping it)
- Four mint leaves
Preparation:
- Put your milk in a small pan on the stovetop and heat to a boil.
- Put first five ingredients into a blender. Blend well – about 1 minute. Then stream in the boiling milk and blend until smooth – about 1 minute. The hot milk will cook the egg.
- Pour into cappuccino or espresso cups and refrigerate for 50 minutes (or more – you can make these hours ahead, or even a day ahead).
- Whip the cream with some sugar and vanilla (usually only 2-3 minutes).
- Chill for 50 minutes. Serve with a dollop of whipped cream and mint sprig.
Notes: These are very rich so I think they are even better with strawberries. Dip the strawberries into the chocolate – yum!!
Wine Suggestions: I would skip the wine – these are so rich, but I’ll add the same notes here I included with the chewy cherry brownies. I often hear people say they like red wine and chocolate. I can see how this might work in some unique cases of overripe, almost sweet wines, but I prefer my wine to be a bit sweeter than my dessert. I think a late harvest zinfandel or a tawny port could be awesome with chocolate, and fortified fruity wines like Banyules and Ruby Ports typically have cocoa or chocolate in the nose, as well as other berry fruits like cherry and raspberry and are classic companions to chocolate.
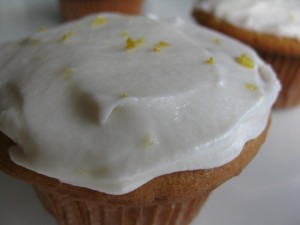
Meyer Lemon Cupcakes
Time: approximately 1.5 hours start to finish; 30 minutes to prepare batter and distribute into cups; 25 minutes to bake and make icing; 20 minutes to cool; 10-15 minutes to frost
Serves: 24-30 cupcakes
Inspired by: Arnie and Alice gave us a whole basket of beautiful Meyer lemons last night. Thank you Arnie and Alice! It’s Shannon’s birthday gathering tonight in a couple of different places so I decided to get started using a few of the lemons for cupcakes. I’ve always loved anything super lemony and the icing on these accomplishes that. This is a mishmash of a lot of different recipes I’ve noted over the years for lemon cake and icing with my various tweaks. This recipe will use 2-5 Meyer lemons depending on the size and amount of juice. I used three small lemons that were pretty juicy when I made this today. There are of course many things you can do to make these look very pretty, but I prefer to keep them very imperfect and very “homemade” in appearance.
Ingredients for the batter:
- 1 cup unsalted butter – softened
- 2 cups granulated sugar
- 3 eggs
- 3-5 teaspoons grated lemon peel
- 3 1/2 cups all purpose flour (or cake flour might make them even lighter)
- 3 teaspoons baking soda
- 1/2 teaspoon baking powder
- 1/2 teaspoon salt
- 1 cup sour cream (1 small 8 oz container)
- 1 cup plain yogurt (1 small 8 oz container)
Ingredients for the frosting:
- 1 half cup unsalted butter – softened (1 stick)
- 4 cups confectioners sugar (1 16 oz box)
- 4-5 tablespoons juice of the Meyer lemons
- 1 teaspoon vanilla extract
- 1 teaspoon grated lemon peel
Preparation:
- Start by grating the outside of the skins of the Meyer lemons until you have enough zest (approximately 6 teaspoons – only grate the yellow skin, not the white part under that as it can be bitter).
- Then juice the lemons in a small bowl until you have enough juice (approximately 5 tablespoons).
- In a large mixing bowl; mix the butter and sugar until creamy.
- Beat in the eggs.
- Add the lemon peel and vanilla extract. (When the lemons peel has a nice flavor use more, if it’s too bitter use less).
- In a separate bowl – combine the dry ingredients: flour, baking soda, baking powder and salt. Mix well.
- Add the dry ingredients to the butter/sugar/egg mixture and mix well. Batter will be thick.
- Add the sour cream and yogurt and mix well.
- Fill paper-lined muffin cups with 1/3 – 1/4 cup of batter (depending on whether you want 24 or 30).
- Bake at 350 degrees for 20 – 30 minutes – until they are barely browned and a toothpick inserted in the center comes out clean. Cool for 20 minutes.
- You can make the frosting while the cupcakes are cooling —
- Combine the butter and confectioners sugar in a medium sized mixing bowl.
- Add the vanilla, half of the lemon juice (reserve half), 1/2 teaspoon of the lemon peel (reserve the other 1/2 teaspoon) and beat until smooth and creamy. Keep adding additional lemon juice until you get your desired frosting consistency and flavor. (I like a lot of lemon juice for a very lemony frosting, but if add too much the frosting will be runny. If it does get runny, add additional confectioners sugar to thicken.)
- Once they are cool, frost the cupcakes and sprinkle each one with just a few tiny pieces of grated lemon peel.
Pear, Apple, Cranberry Crisp
Time: approximately 1 hour 40 minutes; 40 minutes to prepare, 50-60 minutes to bake.
Serves: 10-14
Inspired by: Dinner at Joan and Doug Stone’s house. After a fabulous dinner Joan served this crisp for dessert. It was awesome. Perfect with vanilla ice cream! I had forgotten that crisps and cobblers are some of my favorite desserts. My mom must have made this when I was a kid because I remember loving it way back then. I have made these from time to time without any recipe because having fruit, flour, brown sugar, oats and butter in the kitchen is pretty common, the quantities aren’t too important, and it is tastes awesome even without some of nuances in this recipe. I do, however, really like the flavors that the cranberries and orange zest add. Joan told me her recipe was from a Barefoot Contessa cookbook. I googled it after I got home, found someone elses posting of it, and made it as one of our many desserts for Thanksgiving dinner. I’m finally documenting it so I remember to make these now and then. They work well with all kinds of fruit, but this is my favorite. This may not be exactly what the orginal recipe is as I often modify a bit, but it’s close.
Ingredients for the “bottom”:
- 2 pounds ripe pears (4 pairs)
- 2 pounds apples (5-6 apples)
- 3/4 cup dried cranberries
- 2 tablespoons grated orange zest
- 1 teaspoon grated lemon zest
- 2 tablespoons freshly squeezed orange juice
- 2 tablespoons freshly squeezed lemon juice
- 1/2 granulated sugar
- 1/4 cup all purpose flour
- 1 teaspoon ground cinnamon
- 1/2 teaspoon ground nutmeg
Ingredients for the “topping”:
- 1 1/2 cups all purpose flour
- 3/4 cup granulated sugar
- 1/2 teaspoon kosher salt
- 1 cup old-fashioned oatmeal (dry oats)
- 1/2 pound (2 sticks) cold, unsalted butter, diced
Preparation:
- Preheat the oven to 350 degrees.
- Mix the granulated sugar, flour, cinnamon and nutmeg in a small bowl.
- Peel and core the the pears and apples; cut them into 1 inch chunks.
- Place the fruit in a large bowl and toss with the cranberries, zests and juices.
- Add the mixture of granulated sugar, flour, cinnamon and nutmeg to the fruit and toss well.
- Pour into a 9 x 12 x 2 baking dish – you may have a little bit extra that you can make in a another small baking dish – be sure to leave enough room to add the topping.
- Next make the topping: combine the flour, sugars, oats and diced cold butter in the bowl of an electric mixer with a paddle attachment. Mix on low speed for 1 to 2 minutes, or until the mixture is in large crumbles.
- Sprinkle the topping evenly over the fruit, covering the fruit completely.
- Place the baking dish on a parchment-lined sheet pan and bake for 50 minutes to 1 hour, until the top is brown and the fruit is bubbly. Serve warm.
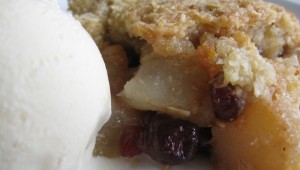
Notes: I think this must be served with vanilla ice cream! This is super easy to make early in the day and keep refridgerated until you are ready to bake it that evening.
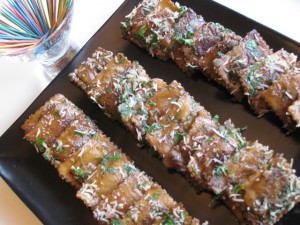
Balsamic Ravioli
Time: 25 minutes
Serves: 4-6 as a main dish for dinner
Inspired by: Rachael Ray. I don’t watch much TV so I miss a lot of the great cooking shows – although I may want to start watching more of them. Caught some snippets once of Rachael Ray making this a couple of years ago and tried it and loved it and everyone else seems to love it too. This may not be her exact recipe, but it’s very close.
Ingredients:
- Two packages of fresh ravioli (I like “The Pasta Shop” Porcini & Truffle or Butternut Squash or Sweet Onion and Red Chard or any of those fancy, fun fresh raviolis). The size and shape do not matter. The packages I buy say that they serve 2-4 people.
- 1/2 – 3/4 cup chopped parsley
- 1/2 – 3/4 cup grated parmesan cheese
- 1/4 cup balsamic vinegar
- 2-3 tablespoons salted butter
Preparation:
- Heat a large pot of water for cooking the ravioli. Add some olive oil so the raviolis don’t stick to each other.
- In a large sauté pan, on medium to medium-low heat, drop in 2-3 tablespoons of very cold butter and let it melt and brown.
- While you are waiting, it’s a good time to wash, destem and chop your parsley and grate your cheese.
- When the water boils, cook your ravioli according to instructions (usually about 6-7 minutes). Stir now and then so they don’t stick to each other. Drain in a colander when done.
- Put the ravioli in the pan with the browned butter, turn up the heat to medium high and toss in the butter.
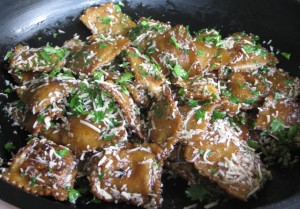
- Add the balsamic – it will sizzle. Toss the ravioli in the butter and balsamic and watch it begin to caramelize. If you want your raviolis to get a bit crispy you can turn up the heat even more – just toss them often so they don’t burn. This process takes about 5 minutes or so.
- In a separate bowl, toss the ravioli with the parsley and Parmesan and serve.
Notes: Using fresh ravioli with a yummy filling is key, but the browned butter and caramelized balsamic is also what makes these awesome. For parties, you can let these cool to room temperature and then line them up on a plate and serve with large toothpicks or skewers. They are good hot, warm, room temperature, and even cold out of the refrigerator the next day (if they last that long!).
Wine Suggestions: I like these with a high-acid, crisp white wine such as a Chablis, White Burgundy or Gruner Veltliner. But if I do them with a Porcini filling, then a yummy Red Burgundy is fabulous!
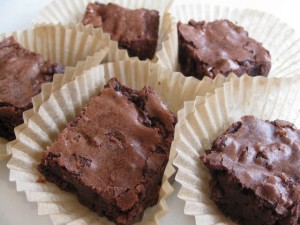
Chewy Cherry Brownies
Time: approximately 1 hour; 20-25 minutes prep; 30-35 minutes to bake
Serves: approximately 30 2 x 2 inch squares
Inspired by: My friend Jeanette makes the most amazing brownies. She never gives out her recipe – smart girl! I am making desserts for my New Years Eve party and wanted to try one new dessert. It’s funny to realize that I’ve never made brownies. As I thought about what I’d like in a brownie, chewy and cherries came to mind (I love both) so I decided to at least attempt something like that. If you are a brownie “purist” I’m sure you’ll want to skip the cherries. I took the core of an old recipe on the Sunset magazine website for chewy brownies and then added my own twists — dried tart cherries and orange zest. I have no idea if the orange zest did anything at all since the other flavors are so strong/rich, but it sounded good to me when I saw an orange here in my kitchen. I might even try adding a bit more next time. I can’t believe how easy they were to make, but the jury is still out…. I wasn’t crazy about how “gooey” they came out initially. For me, chewy = great. Gooey = ?? I’m not sure about that yet. I did find, however, that they were awesome with a perfect consistency two days after making them.
Ingredients:
- 1 cup unsalted butter, cut into chunks
- 4 ounces of unsweetened chocolate, broken into chunks (1/2 of an 8 oz Ghirardelli bar)
- 4 large eggs
- 2/3 cups sugar
- 3 tablespoons orange zest (or whatever you get by grating the peel of one orange)
- 2 teaspoons vanilla
- 1 cup all purpose flour
- 1/4 – 1/2 cup semi-sweet chocolate pieces (the other half of an 8 oz Ghirardelli bar broken into small pieces)
- 1/2 cup dried and pitted cherries (I used Montmorency cherries that I found at Trader Joes)
Preparation:
- In a small saucepan melt the butter and the unsweetened chocolate on medium to low heat. Begin stirring once it is soft and remove from heat once it is melted.
- In a large bowl, hand mix the eggs well.
- Add the sugar, vanilla and orange zest; mix well.
- Add the chocolate/butter mixture; mix well.
- Add the flour and mix well (you can easily do all the mixing by hand).
- Butter a 9 x 13 x 2 inch baking dish and pour the brownie mixture into the dish.
- Sprinkle the semi-sweet chocolate pieces and cherries over the top evenly and then push down and spread a bit so they are slightly covered with brownie mix.
- Bake in a 350 degree oven for 25 minutes.
- It should spring back a bit with a quick touch, but unlike a pie, an inserted knife will not come out clean – it should still be pretty gooey inside.
- Let cool completely on a rack before cutting. Will stay fresh for a couple of days (normally I’d say in an air tight container but I left mine in pastry cups in the open air and they were even better two days later).
Notes: I originally used 3/4 cup of the cherries and the semi-sweet chocolate chips and a bit more chocolate in the initial mix and I think it was too much of both, so I already modified the recipe a bit. I might even skip adding the chocolate chips at the end next time and see how they are without. I need a lot more experimentation here – but wanted to keep these notes for next time I try this again!
Wine Suggestions: I would skip the wine – these are so rich, but I’ll add a few notes here. I often hear people say they like red wine and chocolate. I can see how this might work in some unique cases of overripe, almost sweet wines, but I prefer my wine to be a bit sweeter than my dessert. I think a late harvest zinfandel or a tawny port could be awesome with chocolate, and fortified fruity wines like Banyules and Ruby Ports typically have cocoa or chocolate in the nose, as well as other berry fruits like cherry and raspberry and are classic companions to chocolate.

