Frosted Butter Cookies with a Hint of Lemon

Time: Approximately 2 hours active: 30 minutes to make the dough, 30 minutes to rollout and cut cookies, 30 minutes to bake, 30 minutes to decorate. Also allow at least 2 hours to chill the dough before rolling it out and at least 2 hours after decorating for the frosting to dry.
Serves: 1 batch makes 20-25 medium sized cookies. These pictures show a double batch.
Inspired by: My family, like many, had a tradition of decorating cookies together at Christmas. Since I love everything lemon and have a Meyer lemon tree, I decided to add my own twist that gives these just a hint of lemon. I never make them at Christmas, but do enjoy making them around other festive holidays.
Cookie Ingredients:
- 3/4 cup softened unsalted butter (1 1/2 sticks)
- 2/3 cup granulated sugar
- 1/4 teaspoon salt
- 2 egg yolks
- 1 tablespoon lemon zest
- 1/2 teaspoon vanilla extract
- 2 cups unsifted all purpose flour
Frosting Ingredients:
- Confectioners sugar – approximately 1 cup
- Fresh lemon juice – 1-3 teaspoons
- Food dye if you want to color your frosting, and any other sprinkles, sparkles or decorations you’d like
Cookie Dough Preparation:
- Measure butter, granulated sugar and salt into bowl. With electric mixer, beat until smooth.
- Add egg yolks, lemon zest, lemon extract and vanilla extract and beat until fluffy – 2 minutes.
- Gradually add flour, stirring with mixer or wooden spoon until well combined and smooth.
- With hands, shape dough into ball. Place on waxed paper or plastic wrap. Flatten into disc and wrap.
- Refrigerate 2 hours or overnight until dough is firm.
Bake Cookies:
- Preheat oven to 325 degrees F.
- On lightly floured pastry board, roll out the dough to 1/4 inch thick and press together cracks at edges. Use cookie cutters for cut outs. Place cookies 1 inch apart on uncreased sheets (using parchment paper can help keep them from burning).
- If cookies start getting soft while making them, it can help to put the cookie sheet with the cookie cut outs into the freezer for 5 minutes before baking. This will help them will hold their shape better while baking.
- Bake 10-15 minutes or until edges are just barely golden.
- Remove to wire rack to cool.
Icing:
- In a small bowl or coffee cup, mix 1 cup of confectioners sugar with a teaspoon of lemon juice. Add lemon juice and continue stirring until you get your desired consistency. A thinner icing will be more like a glaze. A thicker icing will create better color.
- After cookies have cooled, use a pastry brush for glazing/painting, and dust with sprinkles/sparkles while the frosting is still wet.

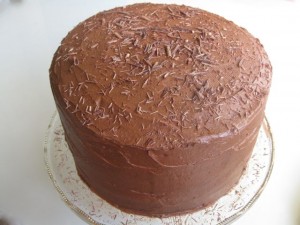
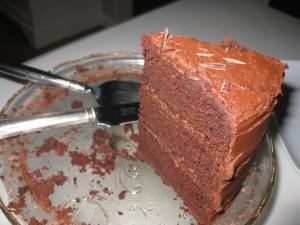
Chocolate Layer Cake with Chocolate-Orange Buttercream Frosting
Time: approximately 2 hours (not including cooling time for the cake). Approximately 1.5 hours to mix and bake the cake. While cake is baking you can make the frosting. After allowing at least an hour for cooking, approximately another 15-30 minutes to frost the cake and make chocolate shavings.
Serves: 10-16
Inspired by: I know a lot of my friends like chocolate and chocolate cake. We celebrated the birthdays last week of two girlfriends, Kristi and Michelle, so I thought I’d try my first chocolate cake. After reading a zillion recipes I settled on a combined version of one for the cake (really liked the idea of the lavender essence) and this icing recipe from the March 2004 issue of Bon Appetite got rave reviews. I thought the icing was a winner. The cake was good, but I’d like to still work on an even moister version when I’m up for experimenting again.
Ingredients for the batter:
- 1 cup (2 sticks) unsalted butter, softened at room temperature
- 4 eggs (at room temperature)
- 3 cups light brown sugar, packed
- 2 teaspoons pure vanilla extract
- 3 cups sifted cake flour
- 3/4 cup unsweetened cocoa powder
- 1 tablespoon baking soda
- 2 teaspoons dried lavender blossoms, finely ground in spice mill or mortar and pestle
- 1/2 teaspoon salt
- 1 1/3 cups sour cream
- 1 1/2 cups hot coffee
Ingredients for the frosting:
- 8 ounces bittersweet or semisweet chocolate, chopped
- 1/2 cup unsweetened cocoa powder
- 7 tablespoons (or more) water
- 1 1/2 cups (3 sticks) unsalted butter, softened at room temperature
- 4 cups powdered sugar, divided
- 1 tablespoon grated orange peel
- 2 teaspoons vanilla extract
- 1/2 teaspoon coarse kosher salt
- 1 tablespoon Grand Marnier or other orange liqueur
- Small piece of thick chocolate (use a vegetable peeler along the chocolate to create shavings)
Cake preparation:
- Preheat the oven to 350 degrees. Butter 3 (8 or 9 inch) cake pans. Lightly butter the pans. Cut 3 circles of parchment paper to fit the bottoms of the pans, press them in, butter them, and use flour or cocoa powder to coat them (or a combo).
- Mix the dry ingredients with a hand whisk: sifted flour, baking soda, cocoa powder, lavender and salt and set aside.
- In an electric mixer, cream the butter until smooth. Add the sugar and eggs and mix until fluffy, about 3 minutes. Add the vanilla and mix.
- Add 1/2 of the flour, then 1/2 of the sour cream and mix. Repeat with the remaining flour and sour cream. Drizzle in the hot coffee and mix until smooth. The batter will be thin. Pour into the prepared pans and bake until the tops are firm to the touch and a toothpick inserted into the center comes out clean, about 35 minutes. Halfway through baking you can rotate the pans in the oven to ensure even baking, but otherwise try not to open the oven. Let cool in the pans for 10 minutes. Turn out onto wire racks and let cool completely before frosting. You can also wrap them up well in plastic at this point and store them in the refrigerator overnight – be sure to separate them with parchment paper or plastic.
- While the cakes are cooling, make the frosting.
Frosting preparation:
- Stir 8 ounces chocolate in top of double boiler set over simmering water until smooth. Cool until barely lukewarm but still pourable. Mix cocoa powder and 7 tablespoons water in heavy small saucepan. Stir over medium-low heat in a seprate sauce pan until smooth and thick, but still pourable, adding more water by teaspoonfuls if necessary. Cool.
- Beat butter, 1/3 cup powdered sugar, and orange peel in large bowl to blend. Add melted chocolate, vanilla, and salt; beat until smooth. Beat in cocoa mixture. Gradually add remaining 3 and 2/3 cups powdered sugar and beat until frosting is smooth. Mix in Grand Marnier.
- Place first cake layer on platter. Slice off the very top to flatten if necessary. Spread a thick layer of frosting on the top of hte cake. Top with second cake layer. Again, slice off the very top to flatten if necessary. Frost the top of that cake, and then add the third layer and frost the top of that and the sides. Mound chocolate shavings all over the cake and platter. If you use warm chocolate you can create longer curls. (Can be made 1 day ahead. Cover with cake dome and refrigerate. Let cake stand at room temperature 2 hours before serving.
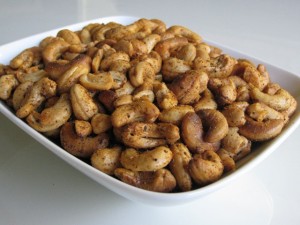
Spiced Cashews
Prep Time: 5-10 minutes
Inspired by: I’ve always loved cashews and almonds, but my favorite is when they are salty and spicy. I was headed out to a party a few nights ago and thought it would be fun to try my spice blend on some cashews. We loved them.
Ingredients:
- 1 pound bag of unsalted roasted cashews
- 1-2 tablespoons Spice it Up …by Karen™
- 1 teaspoon of melted butter (I used unsalted because the spice already has salt, but if you like salty go for the salted butter)
Preparation: Set the oven to about 200 degrees. Toss the cashews in the melted butter – just barely coat them. Then toss with the spice blend until they are covered well. Spread on a cookie sheet and put in the oven for about 5 minutes. Watch them carefully – they will brown very quickly with the butter. This gives them a slightly toaster look and taste and dries the butter out a bit.
Notes: I think anything salty and fatty is fabulous with wine – so these are perfect to nibble on while sipping wine!
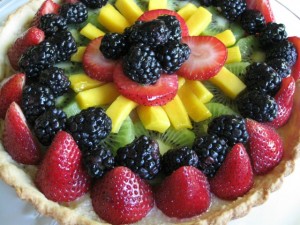
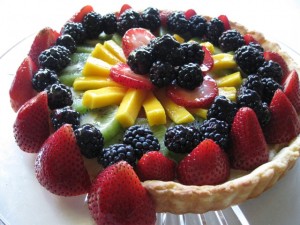
Fruit Tart with Almond Cream
Time: Approximately 1 hour 30 minutes active; 20 minutes to make the dough (refrigerate at least 4 hours, or overnight), 30 minutes to roll out the dough and bake the tart shell, 10 minutes to prepare and spread the almond cream, 30 minutes to cut and arrange the fruit and glaze the top.
Serves: 8
Inspired by: I’ve always thought this was one of the most beautiful desserts, but it never occured to me to try and make it. I just assumed this was something you picked up at a bakery. But in reading through some recipes, it didn’t seem any more difficult or time consuming than some of the other desserts I make now and then. I had some girlfriends for dinner last night so I thought I’d experiment on them. Then Ron mentioned to me that it should have an almond flavor, which sounded fabulous, so I started googling recipes that used marzipan or almonds in some way or another. I decided to use the sweet tart shell recipe that Alice Waters provides in her book “The Art of Simple Food”. I really trust her detailed notes and tips when I’m trying something for the first time. I’ve included some of her tips below. The almond cream filling idea comes from a recipe in Bon Appetit, May 1993. I would definitely make it this way again rather than with the traditional cream filling!
Supplies: 9 inch tart pan with removable bottom.
Ingredients – Sweet Tart Dough:
* This is also the amount of dough to make six 4″ tarts or 30 cookies.
- 8 tablespoons butter (1 stick) – soften for 15 minutes at room temp before using
- 1/3 cup sugar
- 1/4 teaspoon salt
- 1/4 teaspoon vanilla extract
- 1 egg yolk (at room temperature)
- 1 1/4 cups all-purpose unbleached flour
Ingredients – Almond Cream Filling:
- 1 7oz package almond paste (marzipan)
- 3-4 tablespoons whipping cream
Ingredients – Fruit Topping & Glaze:
- Any fruit arranged pretty works for this – strawberries, blackberries, blueberries, raspberries, kiwi, banana, nectarine
- 1/4 cup apricot jam
Sweet Tart Dough Preparation:
- Beat the butter with a wooden spoon or mixer until it is soft and fluffy.
- Add the sugar to the butter and beat it until creamy.
- Add salt, vanilla extract and egg yolk and mix well until completely combined.
- Add flour, stir and fold, and continue to mix well until there are no dry patches.
- Use your hands to gather the dough into a ball and wrap it in plastic. Flatten into a disk and chill for at least 4 hours until firm (you can chill it overnight or keep it in the refrigerator for two nights, or in the freezer for 2 months, but if frozen, let it thaw overnight in refrigerator before using).
- When you are ready to use it, take it out of refrigerator and give it 20-30 minutes to soften.
- It’s much easier to roll it out between two sheets of waxed paper or parchment paper. Flour the sides of the dough and the insides of the waxed paper and start rolling and turning a bit as you roll – add flour as needed. If it gets too soft and sticky while rolling, put it on a baking sheet and let it rest a few minutes in the refrigerator before continuing. Roll the dough out to be 12” in diameter to fit a 9” tart pan.
- Peel the paper off the dough and lightly prick it all over with a fork (this keeps it from bubbling up while baking).
- Invert the dough over the pan and press gently into the edges. Use your thumb to press off excess off the top. Patch cracks with extra dough.
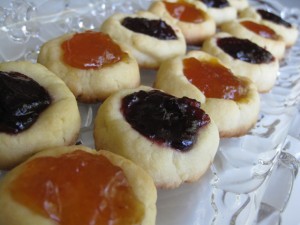
- Excess dough can be rolled out again and used for cookies – make a thumb print and fill with jam or lemon curd.
- Let the dough rest (chill it in the refrigerator) just a bit while preheating the oven to 350 degrees.
- Bake for 15 minutes or until an even light golden color. Halfway through baking, remove the tart shell from oven to pat down any bubbles that may have formed. It helps to put the tart pan on a baking sheet so it is easier to pull in and out of the oven without touching the dough.
- Let pastry cool before unmolding and filling.
Almond Filling Preparation:
- Preheat oven to 400 degrees.
- Mix the almond paste and whipping cream in a food processor until blended really well. Start with 3 tablespoons of the whipping cream but if it still feels too thick and firm, add another tablespoon.
- Spoon the filling into the center of the tart and spread evenly.
- Bake 5 minutes. Remove from oven and let it cool completely.
Fruit Topping Preparation:
- Wash and slice your fruit into the size pieces or slices you’d like to use to decorate the top.
- Arrange the fruit decorativey on the tart. Try to keep it off the sides of the tart shell or it might get soggy.
- Make a glaze by melting the apricot jam in a heavy small saucepan over low heat, stirring frequently. You can add a liquor such as grand marnier if you’d like. Strain the heated liquid so that you have at least 1 tablespoon of warm glaze without any pulp from the jam.
- Use a pastry brush to lightly brush the top of the fruit with the glaze. I suggest keeping it super light and don’t cover the tart crust – this is just to make the fruit look glossy.
- This can be prepared a few hours before serving. You can keep the tart in the refrigerator and take it out about an hour before serving.
Additional Notes:
What to do if you mess up your crust? About a third of the side crust broke off my tart because it didn’t cool properly. Just get creative with how you decorate!
What to do if you have left over dough? I tend to eat it along the way – it is so so so yummy! But I did double my dough so I could make “thumb” cookies. Just make small balls of dough, press your thumb into them, touch up the cracks on the sides, and bake at 350 degrees for about 12 minutes or until lightly golden. Remove from the oven and fill with your favorite jam filling. I used black cherry and apricot jam. Then bake again for about 5 minutes. Remove from the oven and cool!
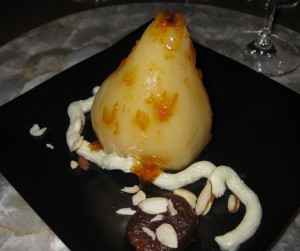
Honey Poached Pear with Citrus Glaze & Gorgonzola Cream
Time: approximately 2 hours 20 minutes; 25 minutes to peel the pears and prepare the poaching liquid, 35 minutes to poach the pears and make the gorgonzola cream, 1 hour to cool pears and reduce citrus to a glaze, 20 minutes to core pears and plate them.
Serves: 10
Inspired by: Last night I hosted a dinner with a blind tasting of 8 Bordeaux wines. We had a young Sauternes for after the dinner – Chateau Rieussec’s second wine. I tasted it once and remember it having very pronounced citrus flavors. I wanted to make a dessert that would be a nice pairing with the wine. I think the most interesting wine and food pairings are with similar flavors and textures,or with contrasting flavors or textures. In this case, I wanted to try to make a dessert that included both elements. I came up with this recipe as I do many – I read about 20 different poached pear recipes from various food blogs on the web to understand common themes. Then I turned to Alice Waters’ “The Art of Simple Food”. I love how she explains generally how to do something and then what you can add or substitute. So, I used her general recipe concept and then added some things that might make the dessert a better match with our wine (honey, orange and lemon juice with their zests, dried apricots). Then I started looking for poached pear recipes that used cheeses in some way – ideally blue veined cheeses because they are known to be a fantastic contrast with Sauternes. One of Emeril Lagasse’s recipes uses Sauternes in the poaching liquid and has a Gorgonzola mixture that is stuffed in the pears. He mixed Gorgonzola together with cream cheese to make it creamier. I liked that concept and decided to mix the Gorgonzola with mascarpone because I like its richness for desserts. Thank you to all my cooking teachers out there!
Supplies:
Large stockpot – mine is a 12-quart that was 8 inches in diameter and it worked because the water covers the pears.
Ingredients for Poaching Pears:
- 9 cups water
- 2 oranges
- 2 lemons
- 1 cup honey
- 1.5 cups sugar
- 1 teaspoon vanilla extract
- 10 Bosc or Bartlett pears- stems in tact – firm and not too ripe
- 10 dried apricots
Ingredients for Gorgonzola Cream:
- 1 cup (about 8 ounces) crumbled Gorgonzola, softened
- 1/2 cup mascarpone
- 2 teaspoons honey
- ¼ teaspoon salt
- ¼ teaspoon freshly ground black pepper
- ¼ cup slivered almonds (optional for garnish)
Preparation:
- With a cheese grater, grate the outer skins of the oranges and lemons (larger pieces of “zest” will look prettier in the final glaze).
- Then juice the oranges and the lemons. (Don’t throw away the juiced lemons – they’ll still be useful.)
- In a large stockpot combine the water, sugar, honey, citrus juices and zests, and vanilla over medium-high heat and bring to a boil, stirring until the sugar is dissolved.
- While the poaching liquid is heating, peel the pears, leaving the stem intact. Rub the pears with the juiced lemon pieces after peeling each one to keep them from oxidizing and discoloring. Cut a small slice off the bottom of each pear so they can sit upright.
- When the poaching liquid comes to a boil and the sugar is dissolved, add the pears and simmer, covered, until tender. If you keep the pears whole, this will take approximately 30-40 minutes for large, fairly firm pears. The pears may float up, so every now and then, move them around so all of the pear gets some time in the poaching liquid.
- While the pears are poaching, in a small mixing bowl combine the Gorgonzola, mascarpone cheese, honey and salt and pepper and mix until thoroughly combined. Taste the mixture and feel free to add more mascarpone and honey if you’d like it to be a bit richer. Transfer the cheese mixture to a pastry bag fitted with a plain tip (or a plastic bag with the corner cut off).
- When the pears are tender, use a slotted spoon to carefully remove them from the poaching liquid and transfer to a plate. Allow to cool standing upright. Remove the apricots as well to a separate dish. Return the poaching liquid to a boil and cook until liquid has reduced to a syrup. This can take quite a while – possibly up to an hour.
- Set syrup aside in a small bowl or until cooled to room temperature.
- Once the pears have cooled, use a melon baller to carefully remove the inner core of the pears, working from the bottom of the pears, and being careful to not puncture the sides or top of the pears. Ideally no seeds or rough core will remain.
- When you are ready to assemble your dessert plates, put each pear on a plate and one of the poached apricots near it. Pipe the Gorgonzola cream in a design around the pear and apricot. Top the cream with a few almond slivers. Spoon a bit of the glaze over the pear. This is not a sticky sweet dessert, but if you’d like it to be sweeter, use more glaze.
- Alternatively, you can pipe the Gorgonzola cream into the cavity of the pears.
- Serve at room temperature with your favorite Sauternes or other white dessert wine.
Wine Suggestions: This recipe was designed as a pairing for a young Sauternes with citrus flavors and it worked well. When pairing wine with dessert, it’s best if your wine is sweeter than your dessert. This turned out to be a fairly light, not-to-sweet dessert and the pairing worked well. The pear tasted fantastic with the contrast of the Gorgonzola cream, and the Sauternes was fantastic with that contrast too. We enjoyed this with a 2007 Carmes de Rieussec, Sauternes.
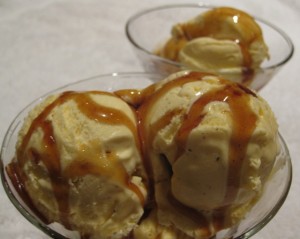
Kahlua Coffee Sauce over Vanilla Bean Ice Cream
Time: 10-15 minutes to make; 1 hour to cool.
Serves: 8-12
Inspired by: My mom made this for me as a kid and I loved it. I never forgot it! I have no idea where she got the recipe. These flavors are very December “holiday-ish”.
Ingredients:
- 1 cup sugar
- 1 cup water
- 3 tablespoons espresso (or, the original recipe called for 1 teaspoon instant coffee)
- 1/8 teaspoon ground cinnamon
- 1/8 teaspoon ground cloves
- 1/8 teaspoon ground nutmeg
- 1/4 cup Kahlua
- 1 quart of your favorite vanilla bean or french vanilla ice cream
Preparation: Boil sugar and water for 5-10 minutes until it begins to thicken. Add spices and espresso and continue boiling for about 5 minutes. Take off heat and stir in Kahlua. If you prefer the alcohol to burn off or want it to thicken a bit more, you can continue to boil it for another minute or two. Let cool to room temperature and serve over ice cream.

