Desserts
Baklava
Candied Lemon Peel
Chewy Cherry Brownies
Chocolate Layer Cake with Chocolate-Orange Buttercream Frosting
Easy Chocolate Mousse
Easy Tiramisu
Frosted Butter Cookies with a Hint of Lemon
Fruit Tart with Almond Cream
Fortune Cookies
Ginger Bread Cookies – Updated
Honey Poached Pear with Citrus Glaze & Gorgonzola Cream
Kahlua Coffee Sauce over Vanilla Bean Ice Cream
Lemon Bars
Lemon Cake
Meyer Lemon Cupcakes
Pear, Apple, Cranberry Crisp
Prickly Pear Cactus Sorbet
Spanish Almond Cookies
> Scroll down for all recipes
Frosted Butter Cookies with a Hint of Lemon

Time: Approximately 2 hours active: 30 minutes to make the dough, 30 minutes to rollout and cut cookies, 30 minutes to bake, 30 minutes to decorate. Also allow at least 2 hours to chill the dough before rolling it out and at least 2 hours after decorating for the frosting to dry.
Serves: 1 batch makes 20-25 medium sized cookies. These pictures show a double batch.
Inspired by: My family, like many, had a tradition of decorating cookies together at Christmas. Since I love everything lemon and have a Meyer lemon tree, I decided to add my own twist that gives these just a hint of lemon. I never make them at Christmas, but do enjoy making them around other festive holidays.
Cookie Ingredients:
- 3/4 cup softened unsalted butter (1 1/2 sticks)
- 2/3 cup granulated sugar
- 1/4 teaspoon salt
- 2 egg yolks
- 1 tablespoon lemon zest
- 1/2 teaspoon vanilla extract
- 2 cups unsifted all purpose flour
Frosting Ingredients:
- Confectioners sugar – approximately 1 cup
- Fresh lemon juice – 1-3 teaspoons
- Food dye if you want to color your frosting, and any other sprinkles, sparkles or decorations you’d like
Cookie Dough Preparation:
- Measure butter, granulated sugar and salt into bowl. With electric mixer, beat until smooth.
- Add egg yolks, lemon zest, lemon extract and vanilla extract and beat until fluffy – 2 minutes.
- Gradually add flour, stirring with mixer or wooden spoon until well combined and smooth.
- With hands, shape dough into ball. Place on waxed paper or plastic wrap. Flatten into disc and wrap.
- Refrigerate 2 hours or overnight until dough is firm.
Bake Cookies:
- Preheat oven to 325 degrees F.
- On lightly floured pastry board, roll out the dough to 1/4 inch thick and press together cracks at edges. Use cookie cutters for cut outs. Place cookies 1 inch apart on uncreased sheets (using parchment paper can help keep them from burning).
- If cookies start getting soft while making them, it can help to put the cookie sheet with the cookie cut outs into the freezer for 5 minutes before baking. This will help them will hold their shape better while baking.
- Bake 10-15 minutes or until edges are just barely golden.
- Remove to wire rack to cool.
Icing:
- In a small bowl or coffee cup, mix 1 cup of confectioners sugar with a teaspoon of lemon juice. Add lemon juice and continue stirring until you get your desired consistency. A thinner icing will be more like a glaze. A thicker icing will create better color.
- After cookies have cooled, use a pastry brush for glazing/painting, and dust with sprinkles/sparkles while the frosting is still wet.

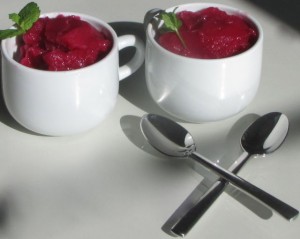
Prickly Pear Cactus Sorbet
Time: 30 minutes to prepare (chill overnight); 10-20 minutes in sorbet maker.
Serves: 6 – 10 single small scoops.
Inspired by: My long time friend Emmett Lynch brought some goodies from nearby orchards. One bag he said was “dangerous” and not to stick my hands into. I peeked inside and saw those beautiful prickly pear fruits that I grew up with in the Arizona dessert! I had a dinner planned with some friends with multiple courses, so decided to use them to make a beautiful deep purple sorbet with lots of lemon and lime. My plan was to serve it as a palate cleanser, or as a transition between the last dinner course and dessert, so I made it a bit more tart than sweet.
Ingredients:
- 1.5-2 pounds of large prickly pear fruits
- 1/2 cup water
- 1/4 cup sugar
- 1-2 teaspoons Cointreau (optional)
- 3-4 tablespoons lime juice
- 3-4 tablespoons lemon juice
- 1 teaspoon lemon or lime zest
- Pinch of salt
- Fresh mint for garnish
Preparation:
- Make a simple syrup by simmering the 1/2 cup water with the 1/4 cup sugar.
- Cool mixture in refrigerator.
- Use tongs to hold the fruits over an open fire (gas stove) and burn off the needles (without burning the fruit).
- Cut off the outside layer of skin and preserve as much fruit as possible. Use a non-staining plastic cutting board and gloves if you don’t want purple stains on your hands and board.
- Put fruit in blender with the simple syrup, pinch of salt, zest, and half of the lemon and lime juices. Puree well and taste.
- Add additional lemon and lime juice until you get your desired level of acidity.
- Strain through a fine mesh sieve to remove seeds and any pieces of skin.
- Chill in refrigerator overnight if possible – or at least for several hours.
- Run this through a sorbet maker. Freeze for a few hours if you would like a harder consistency.
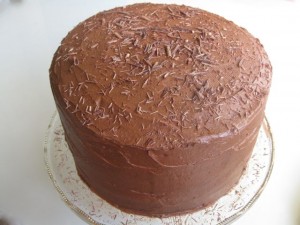
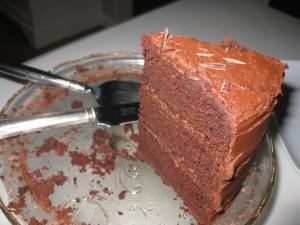
Chocolate Layer Cake with Chocolate-Orange Buttercream Frosting
Time: approximately 2 hours (not including cooling time for the cake). Approximately 1.5 hours to mix and bake the cake. While cake is baking you can make the frosting. After allowing at least an hour for cooking, approximately another 15-30 minutes to frost the cake and make chocolate shavings.
Serves: 10-16
Inspired by: I know a lot of my friends like chocolate and chocolate cake. We celebrated the birthdays last week of two girlfriends, Kristi and Michelle, so I thought I’d try my first chocolate cake. After reading a zillion recipes I settled on a combined version of one for the cake (really liked the idea of the lavender essence) and this icing recipe from the March 2004 issue of Bon Appetite got rave reviews. I thought the icing was a winner. The cake was good, but I’d like to still work on an even moister version when I’m up for experimenting again.
Ingredients for the batter:
- 1 cup (2 sticks) unsalted butter, softened at room temperature
- 4 eggs (at room temperature)
- 3 cups light brown sugar, packed
- 2 teaspoons pure vanilla extract
- 3 cups sifted cake flour
- 3/4 cup unsweetened cocoa powder
- 1 tablespoon baking soda
- 2 teaspoons dried lavender blossoms, finely ground in spice mill or mortar and pestle
- 1/2 teaspoon salt
- 1 1/3 cups sour cream
- 1 1/2 cups hot coffee
Ingredients for the frosting:
- 8 ounces bittersweet or semisweet chocolate, chopped
- 1/2 cup unsweetened cocoa powder
- 7 tablespoons (or more) water
- 1 1/2 cups (3 sticks) unsalted butter, softened at room temperature
- 4 cups powdered sugar, divided
- 1 tablespoon grated orange peel
- 2 teaspoons vanilla extract
- 1/2 teaspoon coarse kosher salt
- 1 tablespoon Grand Marnier or other orange liqueur
- Small piece of thick chocolate (use a vegetable peeler along the chocolate to create shavings)
Cake preparation:
- Preheat the oven to 350 degrees. Butter 3 (8 or 9 inch) cake pans. Lightly butter the pans. Cut 3 circles of parchment paper to fit the bottoms of the pans, press them in, butter them, and use flour or cocoa powder to coat them (or a combo).
- Mix the dry ingredients with a hand whisk: sifted flour, baking soda, cocoa powder, lavender and salt and set aside.
- In an electric mixer, cream the butter until smooth. Add the sugar and eggs and mix until fluffy, about 3 minutes. Add the vanilla and mix.
- Add 1/2 of the flour, then 1/2 of the sour cream and mix. Repeat with the remaining flour and sour cream. Drizzle in the hot coffee and mix until smooth. The batter will be thin. Pour into the prepared pans and bake until the tops are firm to the touch and a toothpick inserted into the center comes out clean, about 35 minutes. Halfway through baking you can rotate the pans in the oven to ensure even baking, but otherwise try not to open the oven. Let cool in the pans for 10 minutes. Turn out onto wire racks and let cool completely before frosting. You can also wrap them up well in plastic at this point and store them in the refrigerator overnight – be sure to separate them with parchment paper or plastic.
- While the cakes are cooling, make the frosting.
Frosting preparation:
- Stir 8 ounces chocolate in top of double boiler set over simmering water until smooth. Cool until barely lukewarm but still pourable. Mix cocoa powder and 7 tablespoons water in heavy small saucepan. Stir over medium-low heat in a seprate sauce pan until smooth and thick, but still pourable, adding more water by teaspoonfuls if necessary. Cool.
- Beat butter, 1/3 cup powdered sugar, and orange peel in large bowl to blend. Add melted chocolate, vanilla, and salt; beat until smooth. Beat in cocoa mixture. Gradually add remaining 3 and 2/3 cups powdered sugar and beat until frosting is smooth. Mix in Grand Marnier.
- Place first cake layer on platter. Slice off the very top to flatten if necessary. Spread a thick layer of frosting on the top of hte cake. Top with second cake layer. Again, slice off the very top to flatten if necessary. Frost the top of that cake, and then add the third layer and frost the top of that and the sides. Mound chocolate shavings all over the cake and platter. If you use warm chocolate you can create longer curls. (Can be made 1 day ahead. Cover with cake dome and refrigerate. Let cake stand at room temperature 2 hours before serving.
Gingerbread Cookies – Updated
Serves: This is a double recipe and makes 75-100 fairly large cookies. When I did a half-batch and made smaller 2″ and 3″ hearts, it still yielded about 50 cookies.
Time: This can be a 6-8 hour project if you use all of the dough, take your time cutting the cookies by hand (using a knife to cut around cardboard cut outs, like these wine bottles and glasses), and then taking your time to decorate. But if you are doing a half-batch of the ingredients below, plan about 30-45 minutes to make the dough, then it should be refrigerated for at least an hour, and plan for about 2 hours to make and decorate the cookies if you use standard cookie cutters, use both racks in your oven, and decorate very simply.
Inspired by: I’ve always thought gingerbread cookies at the holidays are fun. This time I wanted to try something that I haven’t seen before. I used a Martha Stewart recipe for the cookies and the icing and doubled it. However, I’m not a fan of being overpowered by molasses and all of the recipes I saw used quite a lot of it. I substituted one more egg and 3/4 cup of brown sugar for the second cup of molasses and was happy with the outcome.
Ingredients:
DOUGH
- 12 cups all purpose flour
- 2 teaspoons baking soda
- 1 teaspoon baking powder
- 2 cups (4 sticks) unsalted butter (take out of fridge early to soften)
- 2 3/4 cups packed dark-brown sugar
- 8 teaspoons ground ginger (if you like a strong ginger flavor, use two extra teaspoons)
- 8 teaspoons ground cinnamon
- 3 teaspoons ground cloves
- 2 teaspoons finely ground black pepper
- 3 teaspoons course salt
- 5 large eggs
- 1 cup unsulfured molasses
- Fine sanding sugar or eatible glitter, for sprinkling
ICING
- 4 large egg whites
- 8 cups confectioner’s sugar
- 2 lemons, juiced
ADDITIONAL SUPPLIES
- Cookie cutters or cardboard cut outs of the shapes you want and a small sharp knife.
- Non-stick cookie sheets.
Preparation:
- Sift or whisk together flour, baking soda, and baking powder into a large bowl. Set aside.
- Whisk together salt and spices in a small bowl. Set aside.
- In a large bowl, use an electric mixer to blend brown sugar and butter together until fluffy. Add the spice blend, then eggs and molasses. Reduce speed to low. Add flour mixture; mix until just combined. You may need to finish mixing the dough by hand. Divide dough into six round balls, flatten to discs, and wrap each in plastic. Refrigerate until cold – about 1 hour.
- Preheat oven to 350 degrees. Roll out dough on a lightly floured work surface to 1/4-inch thick. Use cookie cutters or trace around cardboard cut outs with a knife to create shapes. Space 2 inches apart on baking sheets and refrigerate until firm (about 15 minutes).
- Bake cookies until crisp, but not dark, 12-14 minutes. Immediately remove from cookie sheets and cool on wire racks.
- To make icing – beat egg whites until stiff but not dry. (Then reserve about 1/2 -1 cup of these stiff whites in a separate bowl). Add sugar (but reserve about 1/2 cup) and lemon juice; beat for 1 minute more. If icing is too thick, add more of the egg whites from the reserve. If it is too thin, add more of the sugar from the reserve. The icing may be stored in an airtight container in the refrigerator for up to 3 days.
- Ice the cookies after they are cooled. Put icing in a pastry bag fitted with a small plain round tip (such as a #2 or #4). Pipe designs and immediately sprinkle with sanding sugar before the icing dries. You can also take some of the icing and put it in a small bowl, add a bit of the reserved egg whites to thin it if needed, and paint it on with a small art brush. Let icing set at room temperature for about 1 hour. Store cookies between layers of parchment paper in an airtight container at room temperature for up to 5 days.
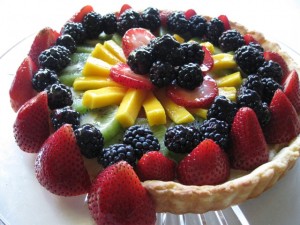
Fruit Tart with Almond Cream
Time: Approximately 1 hour 30 minutes active; 20 minutes to make the dough (refrigerate at least 4 hours, or overnight), 30 minutes to roll out the dough and bake the tart shell, 10 minutes to prepare and spread the almond cream, 30 minutes to cut and arrange the fruit and glaze the top.
Serves: 8
Inspired by: I’ve always thought this was one of the most beautiful desserts, but it never occured to me to try and make it. I just assumed this was something you picked up at a bakery. But in reading through some recipes, it didn’t seem any more difficult or time consuming than some of the other desserts I make now and then. I had some girlfriends for dinner last night so I thought I’d experiment on them. Then Ron mentioned to me that it should have an almond flavor, which sounded fabulous, so I started googling recipes that used marzipan or almonds in some way or another. I decided to use the sweet tart shell recipe that Alice Waters provides in her book “The Art of Simple Food”. I really trust her detailed notes and tips when I’m trying something for the first time. I’ve included some of her tips below. The almond cream filling idea comes from a recipe in Bon Appetit, May 1993. I would definitely make it this way again rather than with the traditional cream filling!
Supplies: 9 inch tart pan with removable bottom.
Ingredients – Sweet Tart Dough:
* This is also the amount of dough to make six 4″ tarts or 30 cookies.
- 8 tablespoons butter (1 stick) – soften for 15 minutes at room temp before using
- 1/3 cup sugar
- 1/4 teaspoon salt
- 1/4 teaspoon vanilla extract
- 1 egg yolk (at room temperature)
- 1 1/4 cups all-purpose unbleached flour
Ingredients – Almond Cream Filling:
- 1 7oz package almond paste (marzipan)
- 3-4 tablespoons whipping cream
Ingredients – Fruit Topping & Glaze:
- Any fruit arranged pretty works for this – strawberries, blackberries, blueberries, raspberries, kiwi, banana, nectarine
- 1/4 cup apricot jam
Sweet Tart Dough Preparation:
- Beat the butter with a wooden spoon or mixer until it is soft and fluffy.
- Add the sugar to the butter and beat it until creamy.
- Add salt, vanilla extract and egg yolk and mix well until completely combined.
- Add flour, stir and fold, and continue to mix well until there are no dry patches.
- Use your hands to gather the dough into a ball and wrap it in plastic. Flatten into a disk and chill for at least 4 hours until firm (you can chill it overnight or keep it in the refrigerator for two nights, or in the freezer for 2 months, but if frozen, let it thaw overnight in refrigerator before using).
- When you are ready to use it, take it out of refrigerator and give it 20-30 minutes to soften.
- It’s much easier to roll it out between two sheets of waxed paper or parchment paper. Flour the sides of the dough and the insides of the waxed paper and start rolling and turning a bit as you roll – add flour as needed. If it gets too soft and sticky while rolling, put it on a baking sheet and let it rest a few minutes in the refrigerator before continuing. Roll the dough out to be 12” in diameter to fit a 9” tart pan.
- Peel the paper off the dough and lightly prick it all over with a fork (this keeps it from bubbling up while baking).
- Invert the dough over the pan and press gently into the edges. Use your thumb to press off excess off the top. Patch cracks with extra dough.
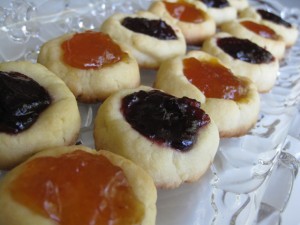
- Excess dough can be rolled out again and used for cookies – make a thumb print and fill with jam or lemon curd.
- Let the dough rest (chill it in the refrigerator) just a bit while preheating the oven to 350 degrees.
- Bake for 15 minutes or until an even light golden color. Halfway through baking, remove the tart shell from oven to pat down any bubbles that may have formed. It helps to put the tart pan on a baking sheet so it is easier to pull in and out of the oven without touching the dough.
- Let pastry cool before unmolding and filling.
Almond Filling Preparation:
- Preheat oven to 400 degrees.
- Mix the almond paste and whipping cream in a food processor until blended really well. Start with 3 tablespoons of the whipping cream but if it still feels too thick and firm, add another tablespoon.
- Spoon the filling into the center of the tart and spread evenly.
- Bake 5 minutes. Remove from oven and let it cool completely.
Fruit Topping Preparation:
- Wash and slice your fruit into the size pieces or slices you’d like to use to decorate the top.
- Arrange the fruit decorativey on the tart. Try to keep it off the sides of the tart shell or it might get soggy.
- Make a glaze by melting the apricot jam in a heavy small saucepan over low heat, stirring frequently. You can add a liquor such as grand marnier if you’d like. Strain the heated liquid so that you have at least 1 tablespoon of warm glaze without any pulp from the jam.
- Use a pastry brush to lightly brush the top of the fruit with the glaze. I suggest keeping it super light and don’t cover the tart crust – this is just to make the fruit look glossy.
- This can be prepared a few hours before serving. You can keep the tart in the refrigerator and take it out about an hour before serving.
Additional Notes:
What to do if you mess up your crust? About a third of the side crust broke off my tart because it didn’t cool properly. Just get creative with how you decorate!
What to do if you have left over dough? I tend to eat it along the way – it is so so so yummy! But I did double my dough so I could make “thumb” cookies. Just make small balls of dough, press your thumb into them, touch up the cracks on the sides, and bake at 350 degrees for about 12 minutes or until lightly golden. Remove from the oven and fill with your favorite jam filling. I used black cherry and apricot jam. Then bake again for about 5 minutes. Remove from the oven and cool!

