Prickly Pear Cactus Sorbet
Time: 30 minutes to prepare (chill overnight); 10-20 minutes in sorbet maker.
Serves: 6 – 10 single small scoops.
Inspired by: My long time friend Emmett Lynch brought some goodies from nearby orchards. One bag he said was “dangerous” and not to stick my hands into. I peeked inside and saw those beautiful prickly pear fruits that I grew up with in the Arizona dessert! I had a dinner planned with some friends with multiple courses, so decided to use them to make a beautiful deep purple sorbet with lots of lemon and lime. My plan was to serve it as a palate cleanser, or as a transition between the last dinner course and dessert, so I made it a bit more tart than sweet.
Ingredients:
- 1.5-2 pounds of large prickly pear fruits
- 1/2 cup water
- 1/4 cup sugar
- 1-2 teaspoons Cointreau (optional)
- 3-4 tablespoons lime juice
- 3-4 tablespoons lemon juice
- 1 teaspoon lemon or lime zest
- Pinch of salt
- Fresh mint for garnish
Preparation:
- Make a simple syrup by simmering the 1/2 cup water with the 1/4 cup sugar.
- Cool mixture in refrigerator.
- Use tongs to hold the fruits over an open fire (gas stove) and burn off the needles (without burning the fruit).
- Cut off the outside layer of skin and preserve as much fruit as possible. Use a non-staining plastic cutting board and gloves if you don’t want purple stains on your hands and board.
- Put fruit in blender with the simple syrup, pinch of salt, zest, and half of the lemon and lime juices. Puree well and taste.
- Add additional lemon and lime juice until you get your desired level of acidity.
- Strain through a fine mesh sieve to remove seeds and any pieces of skin.
- Chill in refrigerator overnight if possible – or at least for several hours.
- Run this through a sorbet maker. Freeze for a few hours if you would like a harder consistency.
Artichoke Sourdough Bisque
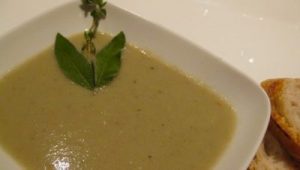
Time: approximately 90 minutes (20 minutes to prepare the artichokes, 20 minutes to chop the other vegetables, 20 minutes to saute, 20 minutes to simmer, 10 to simmer with the bread and then puree the mixure).
Serves: 8
Inspired by: I love artichoke soup. One of my favorites is from Duartes Tavern in Pescadero, CA. For years I’ve wanted to learn to make it, but most are full of cream and not very healthy. Then I saw Chef Tony Baker of Montrio Bistro in Monterey, California demonstrate this soup on a cooking show and it has no cream or butter – just a bit of olive oil and sourdough bread to thicken it.
Ingredients:
- 4 extra large artichokes
- ½ cup virgin olive oil
- 1 medium sized yellow onion
- 1 leek
- 1 celery stalk
- 5 garlic cloves
- 2 cups chopped sourdough bread
- 4 fresh sage leaves
- 1 fresh sprig of thyme
- 6 cups chicken stock (or substitute with vegetable stock) – lower sodium is best so you can season it yourself
- Salt and pepper to taste
Preparation:
- Using a sharp serrated knife, trim the artichoke all the way down to the heart (keep the stem). Use a spoon to scrape away the fuzzy part and discard. Peel the stem and use that in the soup as well, since the stem is an extension of the heart. After the artichokes are clean, roughly slice.
- Wash and roughly chop all of the vegetables and garlic.
- Heat the oil in a large thick-bottomed pan.
- Sweat (sauté without color) the artichokes, onion, leek, garlic, celery and thyme, until tender.
- Add the chicken stock. I used Sheltons all natural chicken broth with salt and spices but if you might prefer low sodium so you can add your own in at the end.
- Gently simmer the soup for 20 minutes.
- Add the roughly chopped sourdough bread and sage and simmer for another 5 minutes.
- In small batches, puree the soup using either a blender, food processor or immersion blender. A conventional blender should produce a nice smooth creamy soup.
- Place all of the soup into a clean saucepan, reheat, and check the seasoning.
- Season with salt and pepper. (I added in another 1/2 – 1 teaspoon of both salt and 1/2 teaspoon of pepper).
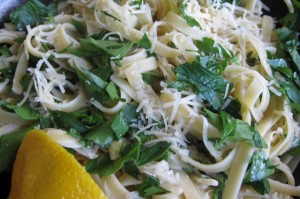
Fettuccini with Asiago, Lemon & Parsley
Time: 10-15 minutes
Serves: As many as you’d like
Inspired by: I grew up with an Armenian grandmother who always made me pasta with butter and muenster cheese. It was soooooo yum! I love those memories of her feeding me the yummiest of foods. I’ve continued to make various versions of pasta with cheese and butter ever since. It’s really one of the few things I could make before I decided to learn to cook 10 years ago! Now I’ve begun using olive oil much more often than butter, and I love adding other fresh flavors, such as lemon and parsley, to many things. This has become one of my favorite pasta dishes now when I don’t have much time to cook or get to the store. Even though I keep very little food in the house, I almost always have these ingredients. I usually prefer fresh pasta, but like most days, today the fridge is virtually empty so I’m using some dried Fetuccini.
Ingredients:
- Pasta of your choice – any shape or size – my preference is usually a wide noodle
- Olive oil – a high quality fruity flavored extra virgin olive oil is best
- Grated asiago cheese (or other hard salty cheese such as parmesan)
- Chopped fresh Italian parsley
- Fresh lemon juice
- Salt to taste
- 1 can of garbanzo beans (optional) – this is my favorite protein souce to add to this pasta that I always keep on hand as well
Preparation: Boil water with a bit of salt for flavor. Add the pasta and a bit of olive oil so it doesn’t stick together. Cook according to instructions and drain in collander. While draining, heat garbanzo beans if you plan to include them. Toss pasta in a bowl with some olive oil, fresh lemon juice, grated cheese, chopped parsley and optional garbanzos.
Notes: I’m not really sure this should be classified as “moderately healthy”, but in the pasta world, this does use some very healthy ingredients. It’s of course best to keep your pasta serving light and to go easier on the cheese and heavier on the parsley! There are some pretty decent quinoa pastas these days and I use them often.
Wine Suggestions: If you use a lot of lemon, a high-acid wine with some lemony flavors such as a White Burgundy is a perfect pairing.
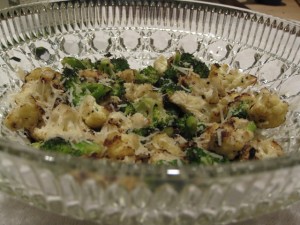
Broccoli and Cauliflower Stir Fry
Time: 20 minutes
Serves: 2-4
Inspired by: I’ve had overcooked broccoli covered in fake cheese and as gross as it was, I knew that it would be awesome if it was cooked perfectly and sprinkled with a really nice hard salty cheese. I’ve since found that pan-frying gives it an extra depth of flavor when you can brown the veggies a bit. I love this – this past winter it has been one of my favorites to make with scallops or any other fish.
Ingredients:
- 2 tablespoons olive oil
- 3-4 cups of broccoli crowns cut into small pieces
- 3-4 cups of cauliflower crowns cut into small pieces
- 1/2 cup parmesan or asiago (or other hard salty cheese) finely grated
- 1/4 teaspoon salt
- 1/2 – 1 teaspoon freshly ground black pepper
Preparation:
- Add 1 tablespoon olive oil to large sauté pan on medium-high heat.
- Add cauliflower and cook for about 5 minutes – edges should start browning.
- Add broccoli and another tablespoon olive oil and salt and pepper – toss well and cook for another 7-8 minutes or until as cooked as you’d like – I prefer the edges browned and almost a bit charred but the veggies not too soft.
- Put into a bowl, toss with the cheese and serve.
Notes: I love this with just about anything, but it’s really nice having hearty, hot vegetables in winter and I especially love this dish with seared scallops.
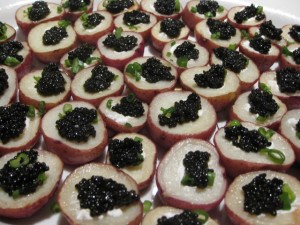
Baby Red Potatoes with Caviar
Time: 45 minutes to prep and cook; 15 minutes to assemble after cooled
Serves: 40 “bites”
Inspired by: This recipe is from Hugh Carpenter’s “Fast Appetizers” cookbook. I was looking for a fun finger food with caviar for New Years Eve. I added a tiny bit of sour cream to these, but I think they’d be great either way.
Ingredients:
- 20 baby red potatoes
- 2 tablespoons flavorless cooking oil (I used a light olive oil)
- 2 ounces fresh caviar, good to best quality
- 2 tablespoons chopped chives (no chives at the market today so I am using chopped spring onion)
- 2 tablespoons sour cream (optional)
Preparation:
- Preheat the oven to 375 degrees
- Cut the potatoes in half and slice off a very small sliver on the rounded side so they don’t wobble around on the cookie sheet
- Rub the potatoes with the oil and place on cookie sheet
- Roast until they feel tender when prodded with a fork – about 30 minutes.
- Cool to room temperature.
- Cut a small scoop/hole in the top of each potato. Fill with caviar and sprinkle with chives. If you are using sour cream, later in just a dab of it before the caviar and chives.
- Refrigerate.
Notes: This can be completed up to 8 hours before serving if you are not using the sour cream. If you are, it can get a little watery so wait and assemble close to serving. Serve chilled.
Wine Suggestions: Caviar and Champagne are always a fun pairing – their complimentary textures are perfect and the high acidity of the champagne is perfect with the brininess of the caviar. Of course any other dry, crisp high-acid white wine would be excellent as well such as a Chablis or other unoaked White Burgundy.
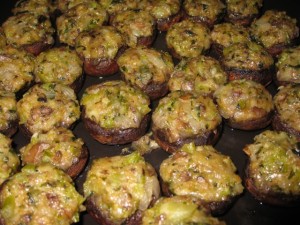
Stuffed Mushrooms
Time: 1 hour
Serves: 45 “bites”
Inspired by: I can’t remember when I first had these. I just know that I’ve always loved mushrooms of any type, and every time I’ve had these I’ve thought they were decadent. With something close to these ingredients as the stuffing, I don’t know how you can go wrong. I love that they are easy to prepare ahead for parties and I think they still taste good even when they cool off and are only at room temperature.
Ingredients:
- 45 cremini mushrooms
- 1 onion, chopped well
- 2 cloves garlic, minced very fine
- 2-3 tablespoons butter
- 5 stalks celery, chopped well
- 1 cup chopped parsley
- 1 1/2 cups grated parmesan
- 1 teaspoon freshly ground black pepper
- salt to taste
- 1/2 – 1 cup bread crumbs
Preparation:
- Wash mushrooms; remove stems carefully to keep mushrooms whole – keep the stems
- Slice off a very small sliver on the rounded side of the mushroom and lay them on a cookie sheet (that keeps them from rolling around)
- Chop all the excess mushroom stems and pieces well
- Melt the butter in a large saute pan and saute the onions, chopped mushroom stems and garlic – about 10 minutes on medium heat
- Add the chopped celery, parsley and black pepper – saute another 10-20 minutes until everything is cooked through
- Add the parmesan and then begin adding some breadcrumbs until the mixture is your desired thickness for stuffing the mushrooms
- Stuff the mushrooms so that they are very full and rounded at the caps
- Bake at 350 degrees for about 20 minutes
Notes: You can prepare these and wrap them up well in the refrigerator a day ahead of cooking. It’s best to bring them to room temperature before baking. And a note to myself – I think chopping all this stuff should work just fine on “pulse” mode in the food processor. Every time I make them I think about that when I’m almost finished chopping. It would save a lot of time!
Wine Suggestions: I love mushrooms with a Red Burgundy, but I think the flavors here would go well with most high-acid crisp whites (White Burgundy, Gruner Veltliner, Sancerre, Chenin Blanc), and light to medium-bodied reds (Red Burgundy/Pinot Noir, Rioja).

