White Bean Pesto Dip
Time: 10-15 minutes
Serves: 8-12 as an appetizer
Inspired by: One of women in my book club, Nancy Beth Garrett, made something very similar to this recently with a pesto sauce from Trader Joes. I couldn’t stop eating it and stuffed myself before dinner!
Ingredients
- 2, 14 oz cans cannellini beans (white kidney beans), drained
- Juice from about ½ a lemon
- 1 garlic clove – crushed
- ½ cup olive oil
- 1 bunch basil
- 2-4 tablespoons freshly grated parmesan cheese
- ½ teaspoon salt
Preparation:
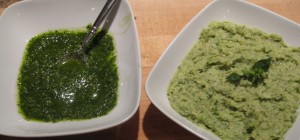
Pesto – Wash and dry basil leaves; put into food processor and chop a bit first. Add olive oil, crushed garlic, grated fresh Parmesan and salt. Chop/blend well. Pour the pesto into a bowl or jar to store (you will only use some of it).
Dip – Without cleaning the food processor, add the beans and 1-2 teaspoons of lemon juice and pulse chop to your desired consistency OR instead, you can just hand mash this in a bowl. Unlike when I make hummus, for this dip I like the beans to keep some texture and lumps, but you can also make this very smooth and creamy. If you want it to be smooth and creamy, continue the rest of this with the processor. Otherwise, put the mixture so far in a bowl, add 2-3 tablespoons of pesto and mix by hand. Add a little at a time and taste to get it to desired intensity. Add additional pesto oil, salt or lemon juice as desired. Garnish with drops of basil oil, basil leaves or flowers.
Notes: Serve with crackers, pita bread or raw veggies such as celery and carrots. You can skip a step and purchase your favorite pesto sauce instead of making your own pesto oil.
Wine Suggestions: Yummy with light, crisp whites and aromatic whites such as Grüner Veltliner, Sancerre, Albarino, Verdejo, Chablis or other lightly oaked White Burgundy. Although I’ve heard that Cabernet Sauvignon is a good pairing with Pesto, and I can see how that could be the case, I think the whites are much better matches flavor and weight-wise for this fairly light dip.
Easy Tiramisu
Time: Approximately 40 minutes from start to finish, and it should rest in the refrigerator at least a few hours before serving. It can also be made up to several days before serving. But good luck not getting into it if you try that!
Serves: 20-30
Inspired by: When I lived in Hong Kong, I discovered that it is a mecca for fabulous food of most ethnicities. After an incredible Italian meal and the best Tiramisu I’d ever had in my first month there, I found myself on a quest to find the perfect Tiramisu. It was fun seeing how many different styles and flavors there were! I must have had more than 20 different versions during my year there. After a few more yummy Tiramisu desserts in Italy over the past few years and surprisingly, my favorite little town in Mexico, Sayulita, I decided it was time to learn to make it. I hosted an Italian wine tasting recently and finally gave it a try. Yum! This recipe is a mix of various versions I found on the web. This one does not use any raw eggs.
Supplies:
- 9-inch-by-13-inch-by 2 inch dish or 15-inch-by-10-inch-by 2 inch dish (for Tiramisu)
- 5 x 9 x 2 in dish (optional – for a second Tiramisu if you have remaining ingredients)
- Small flat dish for dunking ladyfingers in coffee/liquor mixture
- Mixing bowl
- Mixer
- Very fine cheese grater (for the chocolate topping)
Ingredients:
- 16 oz mascarpone cheese
- 3 cups heavy cream (1.5 pints)
- 2 tablespoon confectioners’ sugar
- 1 ½ Cointreau (or dark rum or the liquor of your choice)
- 1 ½ cups espresso or strong French pressed coffee
- 1 tablespoon vanilla extract
- 60 lady fingers cookies
- 4 oz dark chocolate (sweet, not the kind for baking) for grating over the top
Preparation:
- Make espresso or strong coffee.
- Mix espresso with the liquor in equal parts. It is easiest if you put this into a small flat dish so it’s easy to dip one side of the lady fingers cookies quickly and evenly, but any bowl can work.
- In a large mixing bowl combine mascarpone cheese, heavy cream, confectioners’ sugar, 4 tablespoons of the coffee/liquor mixture, and 1 tablespoon vanilla.
- Beat until creamy and smooth and can hold a shape (but not so thick where it becomes butter) – approximately 3-4 minutes.
- Quickly dip one flat side of lady fingers in the coffee/liquor mixture and layer them on the bottom of your pan (approximately 20-23 cookies for the 9-inch-by-13-inch dish) – they do not all have to lay the same direction or look pretty – just fully cover the bottom of the pan.
- IMPOTANT NOTE: if you like your tiramisu stronger (more coffee/liquor flavors) – dip both sides of cookies wet with your coffee/liquor mixture, but I prefer just dipping one side in quickly. I just made this tonight in celebration of my good friend Jeanette – I thought it would be a fun alternative to a birthday cake after our Italian-themed dinner. I thought it turned out too strong – much more so than the last time I made it – and I’m sure it’s because I dunked the cookies rather than dipped one side quickly. Next time I’ll be sure the cookies stay crispy and just one side is dipped in very quickly.
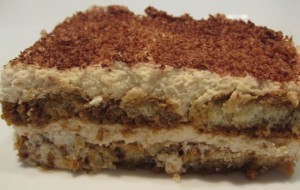
- Spoon the cream mixture over the lady fingers and spread as if you were icing a cake – about ¼ inch thick (don’t use more than half of your mixture, but you’ll more likely use about a quarter or a third of it).
- Then dip and layer the rest of the ladyfingers on top of the cream.
- Top off with additional cream mixture and fully cover the top so it is smooth – again, about ¼ inch thick.
- At this point, depending on what size pan you started with and how thick you layered the cream, you should have just enough ingredients left to make one more small Tiramisu in a 5.5 x 9 x 2 inch glass baking dish.
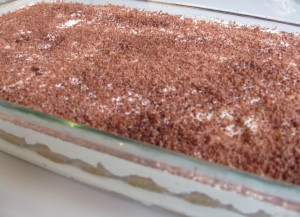
- With a very fine grater, grate the chocolate over the top.
- Let rest in refrigerator for a few hours before cutting – lasts for about one week in the refrigerator.
Wine Suggestions: I’m not a huge fan of wine with Tiramisu. I prefer it with an espresso (and in my case a decaf espresso or I’d be doing gymnastics all night!).
Baba Ganoush
Time: 45-75 minutes (10-15 minutes to make once the eggplant has been cooked and cooled)
Serves: 10-12 as an appetizer
Inspired by: When I began cooking my theme was often “Mediterranean” because I always loved the foods prepared by my Armenian grandparents. I thought some sort of eggplant dip was something I should at least try to make. I found one in an Armenian cook book and then began modifying it slightly as I made it more and more often. I especially love the flavors of this when the eggplant is grilled and gets a bit charred – it adds a fabulous smokey flavor.
Ingredients:
- 2.5 lbs eggplant
- 2 tablespoons olive oil
- 4-6 tablespoons plain yogurt
- 4 tablespoons Tahini
- 2-3 tablespoons lemon juice
- 1 small clove garlic
- 1/2 teaspoon salt
- ½ bunch parsley, minced (garnish)
- Fresh pomegranate seeds (garnish)
Recipe:
- Slice eggplants in half lengthwise, score the face with a knife and brush each face with olive oil.
- Put eggplant face up on cookie sheet and place under pre-heated broiler (40-60 min at about 350), or grill eggplant face down over medium heat (20-30 min). Cook until thoroughly cooked – slightly charred outside and soft on inside.
- Cool.
- With spoon, remove eggplant from the skin and mash thoroughly (can do this in a food processor).
- Then add the Tahini, yogurt, lemon juice, garlic and salt and continue to mix well until creamy.ly.
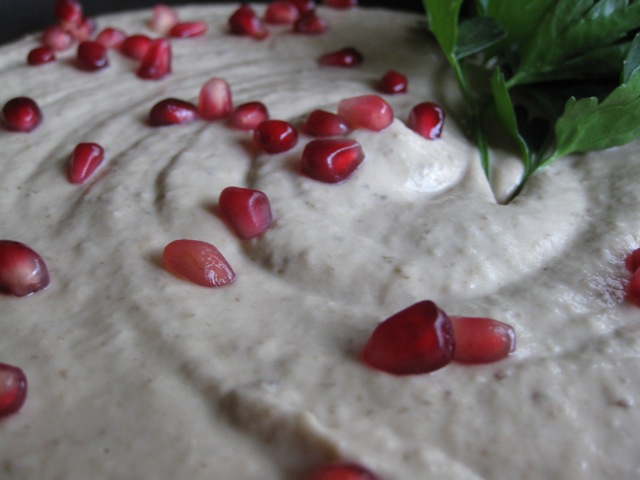
- Spread the dip in a large, round platter. Sprinkle with parsley or garnish with parsley sprigs. Dribble with olive oil (optional). It’s pretty if sprinkled with fresh pomegranate seeds.
Notes: The grilling/broiling step is the key to this recipe as it makes the eggplant taste rich and smoky. This can keep for a couple of days but the garlic flavor gets stronger each day so if you don’t plan to eat right away, use a little less garlic.
Wine Suggestions: Any white or light red works well with this dish as well as other middle-eastern “mezzas”. Try a creamy white such as a rich California or Australian Chardonnay, and for crisp – try a Chablis or other unoaked White Burgundy, Sancerre, Gruner Veltliner or a Spanish Verdejo. Also a light red with a bit of oak tannin such as a Red Burgundy or Rioja is a good accompaniment if you go heavier on the garlic.
Coconut Rice
Time: 5-10 minutes of prep time and 70 minutes of cook time
Serves: 8
Inspired by: My love for Asian flavors. There is a restaurant in Truckee called Dragonfly that I love going to when I’m up in Tahoe to ski. They prepare fabulous Asian-flavored dishes. I had a meal there once that was served with coconut rice and remember coming home to try to replicate the entire dish. It was no where near what I had at Dragonfly because they also also prepare beautiful sauces on their fish that perfectly compliment the rice (or vice versa), but at least my coconut rice turned out well!
Ingredients:
- 2 cups uncooked rice (Basmati rice is the most flavorful and aromatic)
- 2 cups coconut milk (or do 1 full can of coconut milk and make up the balance with water)
- 1 cup water
- 2-4 tablespoons sugar (depends on how sweet you like this)
- 1-2 teaspoons freshly minced ginger (optional – if you like ginger this adds a beautiful flavor)
Preparation: In a 5 x 9 x 2 ½ inch glass baking dish, combine all ingredients; mix well. Seal pan snuggly with aluminum foil. Bake at 350 degrees for 70 minutes. However, you can count on the rice staying hot in the dish covered with foil for about 45 minutes and warm for about 2 hours if you are trying to prepare it in advance for a party.
Notes: I like this rice with a seared Ahi salad because Michelle’s 18 spice and Spice it Up …by Karen™ combined with the papaya are great flavor combinations with the coconut.
Wine Suggestions: The sweetness of this dish will best go best an off-dry or sweet wine such as a Kabinett level German Riesling or similar.
Lemon Pepper Quinoa

Time: 30 minutes
Serves: 8
Inspired by: I started making my fiesta couscous with quinoa occasionally because it’s healthier and started thinking that it would be nice to have a savory version of the quinoa as well. I add the below ingredients and loved it! I’ve decided that I prefer quinoa in a savory dish than a sweet one.
Ingredients:
- 2 cups quinoa (any color, but I prefer white to red or black)
- 2 ½ cups water (I always use 1 1/4 cup water for 1 cup quinoa)
- 2 teaspoons salt
- 2-4 teaspoons olive oil
- freshly zested or grated lemon peel from 2 lemons
- juice of those 2 lemons (or more if you love lemon)
- 1 cup chopped flat leaf parsley
- 1 bunch finely chopped kale or spinach or both (optional – when using kale I usually remove any tough veins)
- ½ teaspoon ground black pepper
- ½ teaspoon ground white pepper
- ¼ teaspoon cayenne (optional)
Preparation:
- Rinse quinoa in a fine mesh sieve – run under cold water until water runs clear.
- Transfer to medium saucepan, add 2 ½ cups water, 1 teaspoon salt and 1 teaspoon olive oil.
- Bring to a boil, cover, and reduce to a simmer; cook until water is completely absorbed – about 20 minutes.
- While it is cooking, zest and juice two lemons (I like meyer lemons). Add to that 1 teaspoon salt, 1 teaspoon olive oil, and the black, white and cayenne peppers.
- Remove from heat and add the above lemon juice/zest/oil/salt and pepper mixture and combine well.
- Add parsley and any other greens, toss well and put the lid back on for another 5 minutes so the greens can wilt.
- Toss again until well combined.
- Season further to taste.
Notes: This is good hot or at room temperature so it’s easy to make ahead for dinner parties. It’s great as a leftover and heated up the next day too.
Lemon-Herb Chicken Kabobs
Time: 30-35 minutes active, 4.5 – 8.5 hours total. Approximately 15 minutes to prepare marinade, 4-8 hours for marinating, 5 minutes to skewer, and 10-15 minutes to grill.
Serves: 4
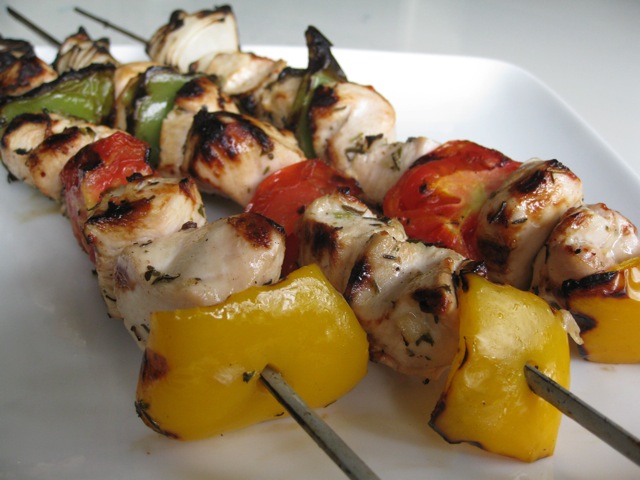
Inspired by: This is probably the most common Armenian marinade for chicken, beef and lamb. My family used this marinade for kabobs when I was growing up and would add bell peppers, onions and tomatoes to the kabobs to make them yummy and beautiful.
Marinade Ingredients:
- ½ cup olive oil
- ½ cup lemon juice
- 1 teaspoon salt
- 1 teaspoon marjoram
- 1 teaspoon thyme
- ½ teaspoon black pepper
- 1 clove garlic, minced
- ½ cup chopped onion
- ¼ cup snipped parsley
Other Ingredients:
- 1 1/2 – 2 pounds chicken
- 1 onion, cut into pieces that are easy to skewer, tossed in olive oil
- 1 bell pepper of each color, cut into pieces, tossed in olive oil
- Optional: cherry tomatoes, tossed in olive oil
- 1/4 cup chopped parsley
- 1/2 lemon
Preparation:
- Mix all of the marinade ingredients in a medium sized bowl.
- Cube the chicken and add it to the marinade. Keep in the refrigerator for 4 – 8 hours.
- Skewer chicken and veggies and grill at about 400 approximately 5-6 minutes each side – you should see grill marks – check to ensure it is cooked through – with metal skewers and fairly high heat – it will cook fast. Even though they look pretty to put the chicken and veggies on the same skewer – for more cooking control, it is easier to skewer the onions together, the bell peppers together, the chicken together, etc.
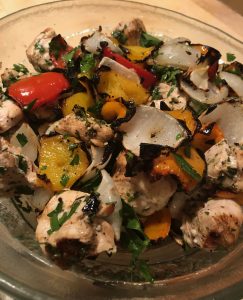
- Remove the chicken and veggies from skewers into a serving bowl. Toss with freshly chopped parsley and drizzle with lemon juice for the perfect final touch.
Notes: This is great with any meal, but nice to incorporate into a mediterranean-themed meal such as hummus or baba ganoush as a starter, and served with armenian rice pilaf and greek salad.
Wine Suggestions: This will go well with creamy, crisp or aromatic white such as a California Chardonnay, White Burgundy or Sauvignon Blanc, or a light bodied red such as a Pinot Noir or Red Burgundy. We found a simple Rioja that also pairs well. I especially love this with a very lemony, high-acid White Burgundy.