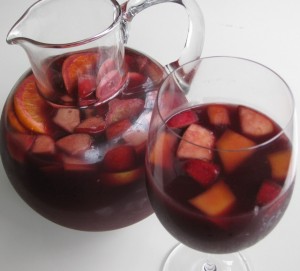
Traditional Red Sangria
Time: This shouldn’t take more than 20 minutes for one batch, but if you are making multiple batches for a party, it can be time consuming to cut up the fruit. It’s also best if you make it 24 hours or so before drinking.
Serves: This recipe yields 6 large wine goblet sized glasses, or 10 smaller glasses.
Inspired by: My visit to Barcelona, Spain in the early 1990’s to visit my friend Georgia when she was living there. We had fabulous sangria with fabulous friends. I think the fruitiness/sweetness of sangria goes well with many of the spices and garlic used in some of the typical Spanish tapas. I don’t make this often, but now and then it’s fun and festive for a party.
Ingredients:
- 1 bottle of red wine (wine suggestions in the “notes” below)
- 1/2 cup of orange liqueur (I prefer Grand Marnier to Cointreau but both are better than triple sec)
- 1-1/2 cups of orange juice
- 1 orange sliced into thin rounds
- 1 lemon sliced into thin rounds
- 1 lime sliced into thin rounds
- 1 apple cut into 1/2 inch pieces
- 1 nectarine (or other stone fruit – peach, plum, mango) cut into 1/2 inch pieces
- 1/4 cup sugar (optional)
Preparation: Put the wine, orange liqueur, and fruit into an airtight container (ideally something easy to shake). Refrigerate it overnight and then taste it to decide if you’d like to add some sugar to sweeten it a bit. If you do, first dissolve the sugar in 1/4 cup of boiling water. Let it cool to room temperature and then add it and shake up your sangria well. You might even want to add a little bit at a time so you can taste it before you add too much.
Notes: Most sangria recipes call for at least 1/4 cup of sugar per one bottle of wine – but I often feel this makes it way too sweet. Sweetness will depend a bit on the type of wine, liquor and orange juice you use, and it is also just a matter of personal preference. Don’t waste your fine wine on sangria, but don’t use 2 buck chuck either! You can usually get 1.5 liter bottles of a basic Mondavi or Woodbridge Cab or Zinfandel at BevMo for $10 and that is a good enough base. You can blend different a couple of different varietals too.
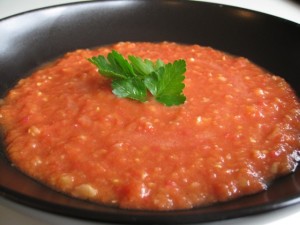
Gazpacho
Time: 15-30 minutes to prepare; I prefer to prepare this a day or two ahead of serving so flavors can meld.
Serves: 6 (I typically make 2-3 batches at a time for a party and fill up a punch bowl).
Inspired by: My mom made this when I was growing up. This is very similar to her original recipe. I’ve had many different versions of gazpacho over the years and love them all. If you have access to really flavorful tomatoes, this is fabulous.
Ingredients:
- 1 firm medium cucumber (2-3 cups chopped). I prefer English or Persian cucumbers so I can leave the skin on.
- 6-8 medium to large ripe, red tomatoes, quartered with white cores removed (this recipe is all about the tomatoes so pick really yummy ones!). I leave the skins on.
- 1-2 large garlic cloves, crushed
- 2-4 teaspoons chili powder
- 1½ teaspoons salt
- 1-2 tablespoons Tobasco
- 1 small piece fresh Jalapeño (optional for extra heat)
- ¼ Bermuda or other sweet, white onion cut into a few pieces (optional – I skip this because I’m not a fan of raw onion)
- ¼ – ½ cup extra virgin olive oil
- 2 -3 cups organic tomato puree – this is optional, but boosts the flavor and red color
- Optional garnishes: garlic croutons, blue corn chips, chopped cucumbers, parsley, cilantro, green onions
Preparation:
- Chop the cucumber into large chunks and pulse in the food processor. I prefer keeping the cucumber a bit chunky and crispy instead of turning it into white puree or foam. I think it improves the texture and color. White puree can make red soup turn pink. Remove and put into a separate bowl.
- Use food processor on pulse mode again to combine the rest of the ingredients. You can stop pulsing when it is still a bit chunky or you can blend it smooth. I prefer it a little bit chunky. It’s best to do this in batches if your food processor isn’t that large.
- Taste, and if needed, add additional salt, chili powder, Tobasco or Jalapeño to your preference.
- Pour into large bowl and hand mix in the chopped cucumber.
- Refrigerate to chill and blend the flavors.
- Serve at room temperature or just slightly chilled.
- You can garnish with chopped parsley, spring onions, cilantro, or with something crunchy such as blue chips or croutons.
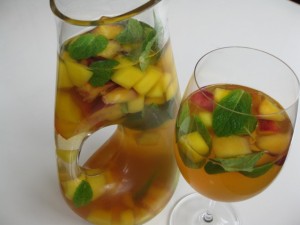
Mango-Nectarine Sangria
Time: This shouldn’t take more than 20 minutes for one batch, but if you are making multiple batches for a party, it can be time consuming to cut up the fruit. It’s also best if you make it 24 hours or so before drinking.
Serves: This recipe yields about 5 large wine goblet sized glasses, or 8 smaller glasses.
Inspired by: I went to Joya in Palo Alto with my good friends Christine and Kristi a couple of months ago to celebrate Kristi’s birthday. The bartender gave us a taste of their peach sangria and it was yummy! It was the first time I had white sangria. I hosted a Spanish themed-party last night and finally got a chance to try something similar. Peaches aren’t in season right now, but I did find nectarines and I love mangos so decided to give that a try with ingredients similar to my red sangria recipe. We all thought this was really yummy. The flavors of the fruit really came through!
Ingredients:
- 1 bottle of white wine (see notes below)
- 1/2 cup Grand Marnier
- 1 mango, cut into 1/2 inch pieces
- 2 nectarines, cut into 1/2 inch pieces
- 1 lime, cut into thin circles (optional – good to include if the wine is a very low acid wine)
- ¼ cup mint leaves
- ¼ cup sugar (optional)
Preparation: Put the Grand Marnier, wine, mango, nectarines and lime in an airtight container (ideally something easy to shake). Refrigerate it overnight and taste it the next day. If you’d like it to be a bit sweeter, dissolve the sugar in boiling water, let it cool to room temperature, add it to your sangria and shake it well. You might want to add a little bit at a time and taste it until it reaches your desired sweetness. A few hours before serving, stir in the mint leaves. Serve chilled.
Notes: Viongier or Torrontes seem like great options for this sangria because of their fabulous aromatics. However, I’ve even tried this with a fairly rich chardonnay and surprisingly, that worked just fine too. Most sangria recipes suggest adding sugar when you combine all the initial ingredients, but I thought it turned out a bit too sweet when I did this the first time. The type of wine and fruit you use will influence the sweetness, and sweetness is also a matter of personal preference. This is why I’ve suggested waiting to add the sugar after it sits overnight so you can get it to your desired sweetness.
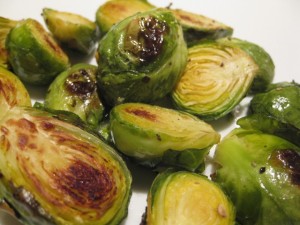
Roasted Brussel Sprouts
Time: 10 minutes to prepare; approximately 15-20 minutes to cook.
Serves: 4
Inspired by: My good friend Jeanette brought these to the Thanksgiving dinner I hosted this past year. That dinner reminded me how much I love them and I’ve been making them much more often ever since. I don’t know why so many people turn up their noses to brussel sprouts. It makes me wonder if they’ve had them cooked properly. When they get roasted like this with olive oil, they get soft and even a bit sweet. I think the key is to cook them really well – I don’t even mind if they get pretty charred – yum!
Ingredients:
- 3 cups brussel sprouts, washed and cut in half
- 1 tablespoon olive oil
- Salt and pepper to taste
Preparation:
- Preheat your oven to 400 degrees.
- Toss the halved brussel sprouts with the olive oil on a cookie sheet or in a baking dish – keep them spread out well.
- Bake for approximately 15-20 minutes.
- How fast they cook depends a bit on your oven. If one side seems to be cooking much faster than the other, you can flip them over with a spatula or thongs about half way through cooking.
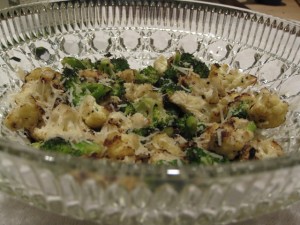
Broccoli and Cauliflower Stir Fry
Time: 20 minutes
Serves: 2-4
Inspired by: I’ve had overcooked broccoli covered in fake cheese and as gross as it was, I knew that it would be awesome if it was cooked perfectly and sprinkled with a really nice hard salty cheese. I’ve since found that pan-frying gives it an extra depth of flavor when you can brown the veggies a bit. I love this – this past winter it has been one of my favorites to make with scallops or any other fish.
Ingredients:
- 2 tablespoons olive oil
- 3-4 cups of broccoli crowns cut into small pieces
- 3-4 cups of cauliflower crowns cut into small pieces
- 1/2 cup parmesan or asiago (or other hard salty cheese) finely grated
- 1/4 teaspoon salt
- 1/2 – 1 teaspoon freshly ground black pepper
Preparation:
- Add 1 tablespoon olive oil to large sauté pan on medium-high heat.
- Add cauliflower and cook for about 5 minutes – edges should start browning.
- Add broccoli and another tablespoon olive oil and salt and pepper – toss well and cook for another 7-8 minutes or until as cooked as you’d like – I prefer the edges browned and almost a bit charred but the veggies not too soft.
- Put into a bowl, toss with the cheese and serve.
Notes: I love this with just about anything, but it’s really nice having hearty, hot vegetables in winter and I especially love this dish with seared scallops.
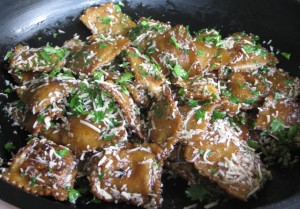
Balsamic Ravioli
Time: 25 minutes
Serves: 4-6 as a main dish for dinner
Inspired by: Rachael Ray. I don’t watch much TV so I miss a lot of the great cooking shows – although I may want to start watching more of them. Caught some snippets once of Rachael Ray making this a couple of years ago and tried it and loved it and everyone else seems to love it too. This may not be her exact recipe, but it’s very close.
Ingredients:
- Two packages of fresh ravioli (I like “The Pasta Shop” Porcini & Truffle or Butternut Squash or Sweet Onion and Red Chard or any of those fancy, fun fresh raviolis). The size and shape do not matter. The packages I buy say that they serve 2-4 people.
- 1/2 – 3/4 cup chopped parsley
- 1/2 – 3/4 cup grated parmesan cheese
- 1/4 cup balsamic vinegar
- 2-3 tablespoons salted butter
Preparation:
- Heat a large pot of water for cooking the ravioli. Add some olive oil so the raviolis don’t stick to each other.
- In a large sauté pan, on medium to medium-low heat, drop in 2-3 tablespoons of very cold butter and let it melt and brown.
- While you are waiting, it’s a good time to wash, destem and chop your parsley and grate your cheese.
- When the water boils, cook your ravioli according to instructions (usually about 6-7 minutes). Stir now and then so they don’t stick to each other. Drain in a colander when done.
- Put the ravioli in the pan with the browned butter, turn up the heat to medium high and toss in the butter.
- Add the balsamic – it will sizzle. Toss the ravioli in the butter and balsamic and watch it begin to caramelize. If you want your raviolis to get a bit crispy you can turn up the heat even more – just toss them often so they don’t burn. This process takes about 5 minutes or so.
- In a separate bowl, toss the ravioli with the parsley and Parmesan and serve.
Notes: Using fresh ravioli with a yummy filling is key, but the browned butter and caramelized balsamic is also what makes these awesome. For parties, you can let these cool to room temperature and then line them up on a plate and serve with large toothpicks or skewers. They are good hot, warm, room temperature, and even cold out of the refrigerator the next day (if they last that long!).
Wine Suggestions: I like these with a high-acid, crisp white wine such as a Chablis, White Burgundy or Gruner Veltliner. But if I do them with a Porcini filling, then a yummy Red Burgundy is fabulous!

