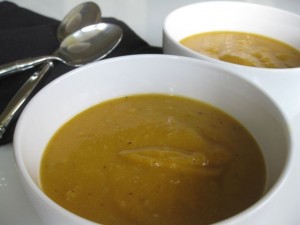
Butternut Squash White Bean Purée
Time: After soaking the beans in water overnight, the soup preparation takes approximately 1 hour and 30 minutes (45 minutes to cook the beans; at the same time you can clean and cut the squash and onions, and sauté the onions; then an additional 45 minutes to cook and purée the soup.)
Serves: 14-16 as a first course.
Inspired by: I saw this recipe in Alice Waters’ “The Art of Simple Food”. It sounded good, hearty and healthy, and although she doesn’t purée the soup, I’ve been curious about how white beans would work as a thickening agent for a soup that was puréed. It worked perfectly! I look forward to trying this concept with other vegetables… carrot and fresh ginger, broccoli, zucchini, mushroom… perhaps roasted red pepper. I like that it adds protein and that it’s creamy without any butter or cream. Potato can be a nice thickener for veggie soups, but the white beans make it much creamer and healthier. This version is doubled from the original Alice Waters recipe.
Supplies: Large soup pot and a sturdy vegetable peeler.
Ingredients:
- 2 cups dried white beans (such as cannellini, haricot blanc, or navy beans)
- 6 cups chicken broth (or try vegetable broth to keep it vegetarian)
- 8 cups water
- 4 tablespoons olive oil
- 4 small onions (sliced thin)
- 6-8 sage leaves (or 4-6 teaspoons dried sage)
- 2 bay leaves
- 2 medium butternut squash, approximately 3 pounds each (peel with a vegetable peeler, scrape clean of strings and seeds, and dice into ½ inch pieces)
- Fresh ground pepper and salt to taste
Preparation:
- Soak 2 cups of beans overnight in 8 cups of water.
- Drain and put in large pot with 6 cups chicken broth and 8 cups water. Bring to a boil and cook until beans are tender (about 45 min). Season to taste when cooked.
- While the beans are cooking, in large heavy bottomed pot combine 4 tablespoons olive oil, 4 onions sliced thin, 3-8 sage leaves and 2 bay leaves. Cook over medium heat until tender (about 15 min).
- Stir in the cubed butternut squash and some salt to taste. Cook for about 5 minutes, and then drain the beans (keeping the liquid) and add 12 cups of their cooking liquid to the squash and onions. Cook at a simmer until the squash starts to get tender. Add the beans and keep cooking into the squash is very soft.
- Purée several cups of the mixture at a time – adding salt and pepper to taste in each batch – and then pouring into a large serving bowl. For a slightly thicker soup, remove approximately 2 cups of the liquid before you purée. You can always add it back in if you want to thin it out a bit.
Wine Suggestions: Contrast with a crisp, high-acid white such as Champagne, Chablis or White Burgundy or compliment with a creamy white such as a barrel fermented (rich, buttery) California Chardonnay.
Gingerbread Cookies – Updated
Serves: This is a double recipe and makes 75-100 fairly large cookies. When I did a half-batch and made smaller 2″ and 3″ hearts, it still yielded about 50 cookies.
Time: This can be a 6-8 hour project if you use all of the dough, take your time cutting the cookies by hand (using a knife to cut around cardboard cut outs, like these wine bottles and glasses), and then taking your time to decorate. But if you are doing a half-batch of the ingredients below, plan about 30-45 minutes to make the dough, then it should be refrigerated for at least an hour, and plan for about 2 hours to make and decorate the cookies if you use standard cookie cutters, use both racks in your oven, and decorate very simply.
Inspired by: I’ve always thought gingerbread cookies at the holidays are fun. This time I wanted to try something that I haven’t seen before. I used a Martha Stewart recipe for the cookies and the icing and doubled it. However, I’m not a fan of being overpowered by molasses and all of the recipes I saw used quite a lot of it. I substituted one more egg and 3/4 cup of brown sugar for the second cup of molasses and was happy with the outcome.
Ingredients:
DOUGH
- 12 cups all purpose flour
- 2 teaspoons baking soda
- 1 teaspoon baking powder
- 2 cups (4 sticks) unsalted butter (take out of fridge early to soften)
- 2 3/4 cups packed dark-brown sugar
- 8 teaspoons ground ginger (if you like a strong ginger flavor, use two extra teaspoons)
- 8 teaspoons ground cinnamon
- 3 teaspoons ground cloves
- 2 teaspoons finely ground black pepper
- 3 teaspoons course salt
- 5 large eggs
- 1 cup unsulfured molasses
- Fine sanding sugar or eatible glitter, for sprinkling
ICING
- 4 large egg whites
- 8 cups confectioner’s sugar
- 2 lemons, juiced
ADDITIONAL SUPPLIES
- Cookie cutters or cardboard cut outs of the shapes you want and a small sharp knife.
- Non-stick cookie sheets.
Preparation:
- Sift or whisk together flour, baking soda, and baking powder into a large bowl. Set aside.
- Whisk together salt and spices in a small bowl. Set aside.
- In a large bowl, use an electric mixer to blend brown sugar and butter together until fluffy. Add the spice blend, then eggs and molasses. Reduce speed to low. Add flour mixture; mix until just combined. You may need to finish mixing the dough by hand. Divide dough into six round balls, flatten to discs, and wrap each in plastic. Refrigerate until cold – about 1 hour.
- Preheat oven to 350 degrees. Roll out dough on a lightly floured work surface to 1/4-inch thick. Use cookie cutters or trace around cardboard cut outs with a knife to create shapes. Space 2 inches apart on baking sheets and refrigerate until firm (about 15 minutes).
- Bake cookies until crisp, but not dark, 12-14 minutes. Immediately remove from cookie sheets and cool on wire racks.
- To make icing – beat egg whites until stiff but not dry. (Then reserve about 1/2 -1 cup of these stiff whites in a separate bowl). Add sugar (but reserve about 1/2 cup) and lemon juice; beat for 1 minute more. If icing is too thick, add more of the egg whites from the reserve. If it is too thin, add more of the sugar from the reserve. The icing may be stored in an airtight container in the refrigerator for up to 3 days.
- Ice the cookies after they are cooled. Put icing in a pastry bag fitted with a small plain round tip (such as a #2 or #4). Pipe designs and immediately sprinkle with sanding sugar before the icing dries. You can also take some of the icing and put it in a small bowl, add a bit of the reserved egg whites to thin it if needed, and paint it on with a small art brush. Let icing set at room temperature for about 1 hour. Store cookies between layers of parchment paper in an airtight container at room temperature for up to 5 days.
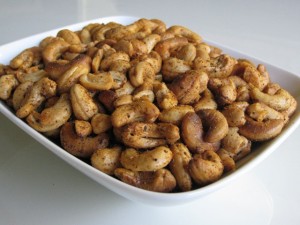
Spiced Cashews
Prep Time: 5-10 minutes
Inspired by: I’ve always loved cashews and almonds, but my favorite is when they are salty and spicy. I was headed out to a party a few nights ago and thought it would be fun to try my spice blend on some cashews. We loved them.
Ingredients:
- 1 pound bag of unsalted roasted cashews
- 1-2 tablespoons Spice it Up …by Karen™
- 1 teaspoon of melted butter (I used unsalted because the spice already has salt, but if you like salty go for the salted butter)
Preparation: Set the oven to about 200 degrees. Toss the cashews in the melted butter – just barely coat them. Then toss with the spice blend until they are covered well. Spread on a cookie sheet and put in the oven for about 5 minutes. Watch them carefully – they will brown very quickly with the butter. This gives them a slightly toaster look and taste and dries the butter out a bit.
Notes: I think anything salty and fatty is fabulous with wine – so these are perfect to nibble on while sipping wine!
Artichoke Sourdough Bisque
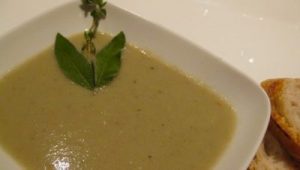
Time: approximately 90 minutes (20 minutes to prepare the artichokes, 20 minutes to chop the other vegetables, 20 minutes to saute, 20 minutes to simmer, 10 to simmer with the bread and then puree the mixure).
Serves: 8
Inspired by: I love artichoke soup. One of my favorites is from Duartes Tavern in Pescadero, CA. For years I’ve wanted to learn to make it, but most are full of cream and not very healthy. Then I saw Chef Tony Baker of Montrio Bistro in Monterey, California demonstrate this soup on a cooking show and it has no cream or butter – just a bit of olive oil and sourdough bread to thicken it.
Ingredients:
- 4 extra large artichokes
- ½ cup virgin olive oil
- 1 medium sized yellow onion
- 1 leek
- 1 celery stalk
- 5 garlic cloves
- 2 cups chopped sourdough bread
- 4 fresh sage leaves
- 1 fresh sprig of thyme
- 6 cups chicken stock (or substitute with vegetable stock) – lower sodium is best so you can season it yourself
- Salt and pepper to taste
Preparation:
- Using a sharp serrated knife, trim the artichoke all the way down to the heart (keep the stem). Use a spoon to scrape away the fuzzy part and discard. Peel the stem and use that in the soup as well, since the stem is an extension of the heart. After the artichokes are clean, roughly slice.
- Wash and roughly chop all of the vegetables and garlic.
- Heat the oil in a large thick-bottomed pan.
- Sweat (sauté without color) the artichokes, onion, leek, garlic, celery and thyme, until tender.
- Add the chicken stock. I used Sheltons all natural chicken broth with salt and spices but if you might prefer low sodium so you can add your own in at the end.
- Gently simmer the soup for 20 minutes.
- Add the roughly chopped sourdough bread and sage and simmer for another 5 minutes.
- In small batches, puree the soup using either a blender, food processor or immersion blender. A conventional blender should produce a nice smooth creamy soup.
- Place all of the soup into a clean saucepan, reheat, and check the seasoning.
- Season with salt and pepper. (I added in another 1/2 – 1 teaspoon of both salt and 1/2 teaspoon of pepper).
Honey Poached Pear with Citrus Glaze & Gorgonzola Cream
Time: approximately 2 hours 20 minutes; 25 minutes to peel the pears and prepare the poaching liquid, 35 minutes to poach the pears and make the gorgonzola cream, 1 hour to cool pears and reduce citrus to a glaze, 20 minutes to core pears and plate them.
Serves: 10
Inspired by: Last night I hosted a dinner with a blind tasting of 8 Bordeaux wines. We had a young Sauternes for after the dinner – Chateau Rieussec’s second wine. I tasted it once and remember it having very pronounced citrus flavors. I wanted to make a dessert that would be a nice pairing with the wine. I think the most interesting wine and food pairings are with similar flavors and textures,or with contrasting flavors or textures. In this case, I wanted to try to make a dessert that included both elements. I came up with this recipe as I do many – I read about 20 different poached pear recipes from various food blogs on the web to understand common themes. Then I turned to Alice Waters’ “The Art of Simple Food”. I love how she explains generally how to do something and then what you can add or substitute. So, I used her general recipe concept and then added some things that might make the dessert a better match with our wine (honey, orange and lemon juice with their zests, dried apricots). Then I started looking for poached pear recipes that used cheeses in some way – ideally blue veined cheeses because they are known to be a fantastic contrast with Sauternes. One of Emeril Lagasse’s recipes uses Sauternes in the poaching liquid and has a Gorgonzola mixture that is stuffed in the pears. He mixed Gorgonzola together with cream cheese to make it creamier. I liked that concept and decided to mix the Gorgonzola with mascarpone because I like its richness for desserts. Thank you to all my cooking teachers out there!
Supplies:
Large stockpot – mine is a 12-quart that was 8 inches in diameter and it worked because the water covers the pears.
Ingredients for Poaching Pears:
- 9 cups water
- 2 oranges
- 2 lemons
- 1 cup honey
- 1.5 cups sugar
- 1 teaspoon vanilla extract
- 10 Bosc or Bartlett pears- stems in tact – firm and not too ripe
- 10 dried apricots
Ingredients for Gorgonzola Cream:
- 1 cup (about 8 ounces) crumbled Gorgonzola, softened
- 1/2 cup mascarpone
- 2 teaspoons honey
- ¼ teaspoon salt
- ¼ teaspoon freshly ground black pepper
- ¼ cup slivered almonds (optional for garnish)
Preparation:
- With a cheese grater, grate the outer skins of the oranges and lemons (larger pieces of “zest” will look prettier in the final glaze).
- Then juice the oranges and the lemons. (Don’t throw away the juiced lemons – they’ll still be useful.)
- In a large stockpot combine the water, sugar, honey, citrus juices and zests, and vanilla over medium-high heat and bring to a boil, stirring until the sugar is dissolved.
- While the poaching liquid is heating, peel the pears, leaving the stem intact. Rub the pears with the juiced lemon pieces after peeling each one to keep them from oxidizing and discoloring. Cut a small slice off the bottom of each pear so they can sit upright.
- When the poaching liquid comes to a boil and the sugar is dissolved, add the pears and simmer, covered, until tender. If you keep the pears whole, this will take approximately 30-40 minutes for large, fairly firm pears. The pears may float up, so every now and then, move them around so all of the pear gets some time in the poaching liquid.
- While the pears are poaching, in a small mixing bowl combine the Gorgonzola, mascarpone cheese, honey and salt and pepper and mix until thoroughly combined. Taste the mixture and feel free to add more mascarpone and honey if you’d like it to be a bit richer. Transfer the cheese mixture to a pastry bag fitted with a plain tip (or a plastic bag with the corner cut off).
- When the pears are tender, use a slotted spoon to carefully remove them from the poaching liquid and transfer to a plate. Allow to cool standing upright. Remove the apricots as well to a separate dish. Return the poaching liquid to a boil and cook until liquid has reduced to a syrup. This can take quite a while – possibly up to an hour.
- Set syrup aside in a small bowl or until cooled to room temperature.
- Once the pears have cooled, use a melon baller to carefully remove the inner core of the pears, working from the bottom of the pears, and being careful to not puncture the sides or top of the pears. Ideally no seeds or rough core will remain.
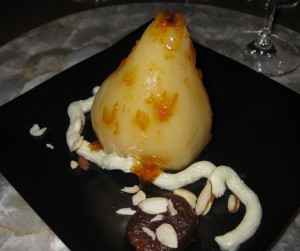
- When you are ready to assemble your dessert plates, put each pear on a plate and one of the poached apricots near it. Pipe the Gorgonzola cream in a design around the pear and apricot. Top the cream with a few almond slivers. Spoon a bit of the glaze over the pear. This is not a sticky sweet dessert, but if you’d like it to be sweeter, use more glaze.
- Alternatively, you can pipe the Gorgonzola cream into the cavity of the pears.
- Serve at room temperature with your favorite Sauternes or other white dessert wine.
Wine Suggestions: This recipe was designed as a pairing for a young Sauternes with citrus flavors and it worked well. When pairing wine with dessert, it’s best if your wine is sweeter than your dessert. This turned out to be a fairly light, not-to-sweet dessert and the pairing worked well. The pear tasted fantastic with the contrast of the Gorgonzola cream, and the Sauternes was fantastic with that contrast too. We enjoyed this with a 2007 Carmes de Rieussec, Sauternes.
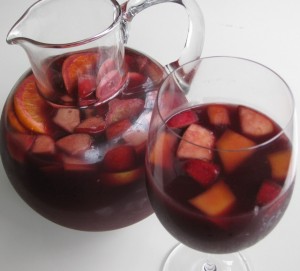
Traditional Red Sangria
Time: This shouldn’t take more than 20 minutes for one batch, but if you are making multiple batches for a party, it can be time consuming to cut up the fruit. It’s also best if you make it 24 hours or so before drinking.
Serves: This recipe yields 6 large wine goblet sized glasses, or 10 smaller glasses.
Inspired by: My visit to Barcelona, Spain in the early 1990’s to visit my friend Georgia when she was living there. We had fabulous sangria with fabulous friends. I think the fruitiness/sweetness of sangria goes well with many of the spices and garlic used in some of the typical Spanish tapas. I don’t make this often, but now and then it’s fun and festive for a party.
Ingredients:
- 1 bottle of red wine (wine suggestions in the “notes” below)
- 1/2 cup of orange liqueur (I prefer Grand Marnier to Cointreau but both are better than triple sec)
- 1-1/2 cups of orange juice
- 1 orange sliced into thin rounds
- 1 lemon sliced into thin rounds
- 1 lime sliced into thin rounds
- 1 apple cut into 1/2 inch pieces
- 1 nectarine (or other stone fruit – peach, plum, mango) cut into 1/2 inch pieces
- 1/4 cup sugar (optional)
Preparation: Put the wine, orange liqueur, and fruit into an airtight container (ideally something easy to shake). Refrigerate it overnight and then taste it to decide if you’d like to add some sugar to sweeten it a bit. If you do, first dissolve the sugar in 1/4 cup of boiling water. Let it cool to room temperature and then add it and shake up your sangria well. You might even want to add a little bit at a time so you can taste it before you add too much.
Notes: Most sangria recipes call for at least 1/4 cup of sugar per one bottle of wine – but I often feel this makes it way too sweet. Sweetness will depend a bit on the type of wine, liquor and orange juice you use, and it is also just a matter of personal preference. Don’t waste your fine wine on sangria, but don’t use 2 buck chuck either! You can usually get 1.5 liter bottles of a basic Mondavi or Woodbridge Cab or Zinfandel at BevMo for $10 and that is a good enough base. You can blend different a couple of different varietals too.

